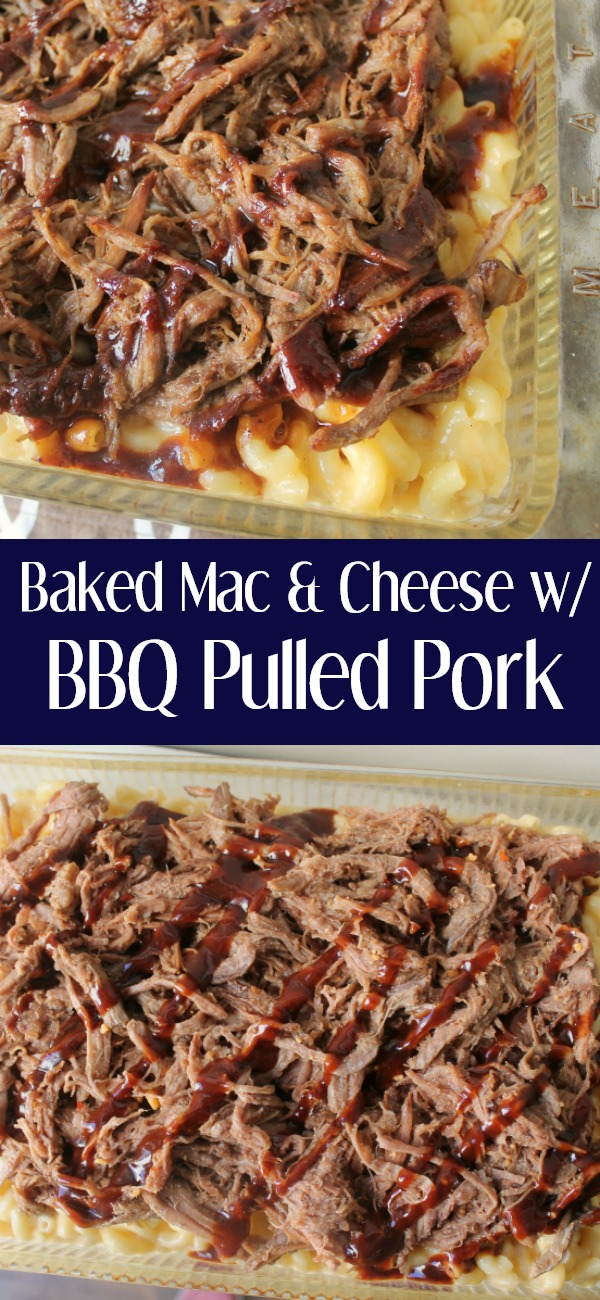
When it comes to comfort food, it’s hard to beat a creamy bowl of homemade mac and cheese. But when you combine rich, cheesy pasta with smoky BBQ pulled pork, you get a dinner that feels straight out of your favorite barbecue restaurant, only better because it’s homemade!
This BBQ Pulled Pork Mac and Cheese is the ultimate comfort food mashup. Tender pasta is coated in a rich, creamy cheese sauce, layered with juicy pulled pork, smoky barbecue sauce, and baked until hot, bubbly, and golden. Every bite is creamy, cheesy, smoky, and packed with bold flavor that keeps everyone coming back for seconds.
Table of Contents
This combination of flavors and textures is guaranteed to be loved by everyone. So if you’ve struggled with dry baked mac and cheese or a grainy cheese sauce, don’t worry, because this recipe will help you with tips and tricks along the way to help you make perfectly creamy mac and cheese every single time.

This dish is perfect as a main course or a side dish. Serve it alongside coleslaw, cornbread, baked beans, or roasted veggies for a complete comfort food dinner. It’s rich enough to stand on its own, but also pairs perfectly with classic barbecue sides for cookouts and parties.
Get ready to see what the fuss is all about: once you taste the creamy cheese sauce mixed with smoky barbecue pork, you’ll understand why this dish is such a crowd favorite.
Why You’ll Love This BBQ Pulled Pork Mac and Cheese
There’s something about the combination of creamy mac and cheese and smoky barbecue pulled pork that instantly feels comforting, and you know it will taste delicious even before you try it. This recipe combines two classic comfort foods into one rich, cheesy, and flavor-packed dinner that works for almost any occasion.
Here are a few reasons this BBQ pulled pork mac and cheese deserves a spot on your menu this week:
- Rich, creamy homemade cheese sauce
- Smoky BBQ flavor in every bite
- Great use for leftover pulled pork
- Easy to customize with different cheeses and toppings
- Crowd-friendly recipe for parties and gatherings
- Can be made ahead of time
- Delicious leftovers that reheat well
- Kid-friendly while still a favorite for adults, too!
This recipe is also ideal for beginner cooks because it’s forgiving and easy to adapt. Once you make the pasta and cheese sauce, all that’s left to do is top it with pulled pork and your favorite BBQ sauce, and bake!
Ingredients You’ll Need
This recipe calls for 2 cups of pulled pork, which can be store-bought, leftover takeout, or homemade from my favorite Instant Pot Pulled Pork recipe. No matter how you make it, it’s sure to turn this recipe into a hearty, comforting, and crowd-pleasing favorite.
- Pulled Pork: Try this homemade recipe!
- Barbecue Sauce: I am obsessed lately with this Yo Mama’s BBQ sauce, and its clean ingredient list.
- Elbow Macaroni
- Whole Milk: You can also use half and half for an even richer cheese sauce
- Cheddar Cheese: We’ll get into more cheese combos to try down below!
- Monterey Jack Cheese
- Butter
- Flour
- Salt
- Pepper
Measurements for each ingredient, along with instructions for making BBQ Pulled Pork Mac and Cheese, are in the printable recipe card below.
Printable BBQ Pulled Pork Mac & Cheese Recipe Card
Ingredients
- 2 cups pulled pork
- 1 ¼ cup barbecue sauce, divided
- 16 oz elbow macaroni
- 2 tbsp butter
- 2 tbsp flour
- 2 cups whole milk
- 2 cups cheddar cheese, shredded
- 2 cups monterey jack cheese, shredded
- salt and pepper, to taste
Instructions
- Preheat oven to 350℉. Grease a 13"x9" pan and set aside.
- Bring a large pot of salted water to a boil and add elbow macaroni. Cook following directions on the box to al dente. Remove from the stove and drain.
- Meanwhile, in a large skillet, melt the butter over medium heat. Add the flour and whisk to combine. Continue stirring constantly for a minute.
- Turn the heat to medium-low and slowly whisk in the milk. Continue cooking and stirring until thickened and smooth.
- Add the shredded cheese in small handfuls, constantly whisking. Once one handful of cheese is melted, add more until it is all stirred in and melted. Season with salt and pepper.
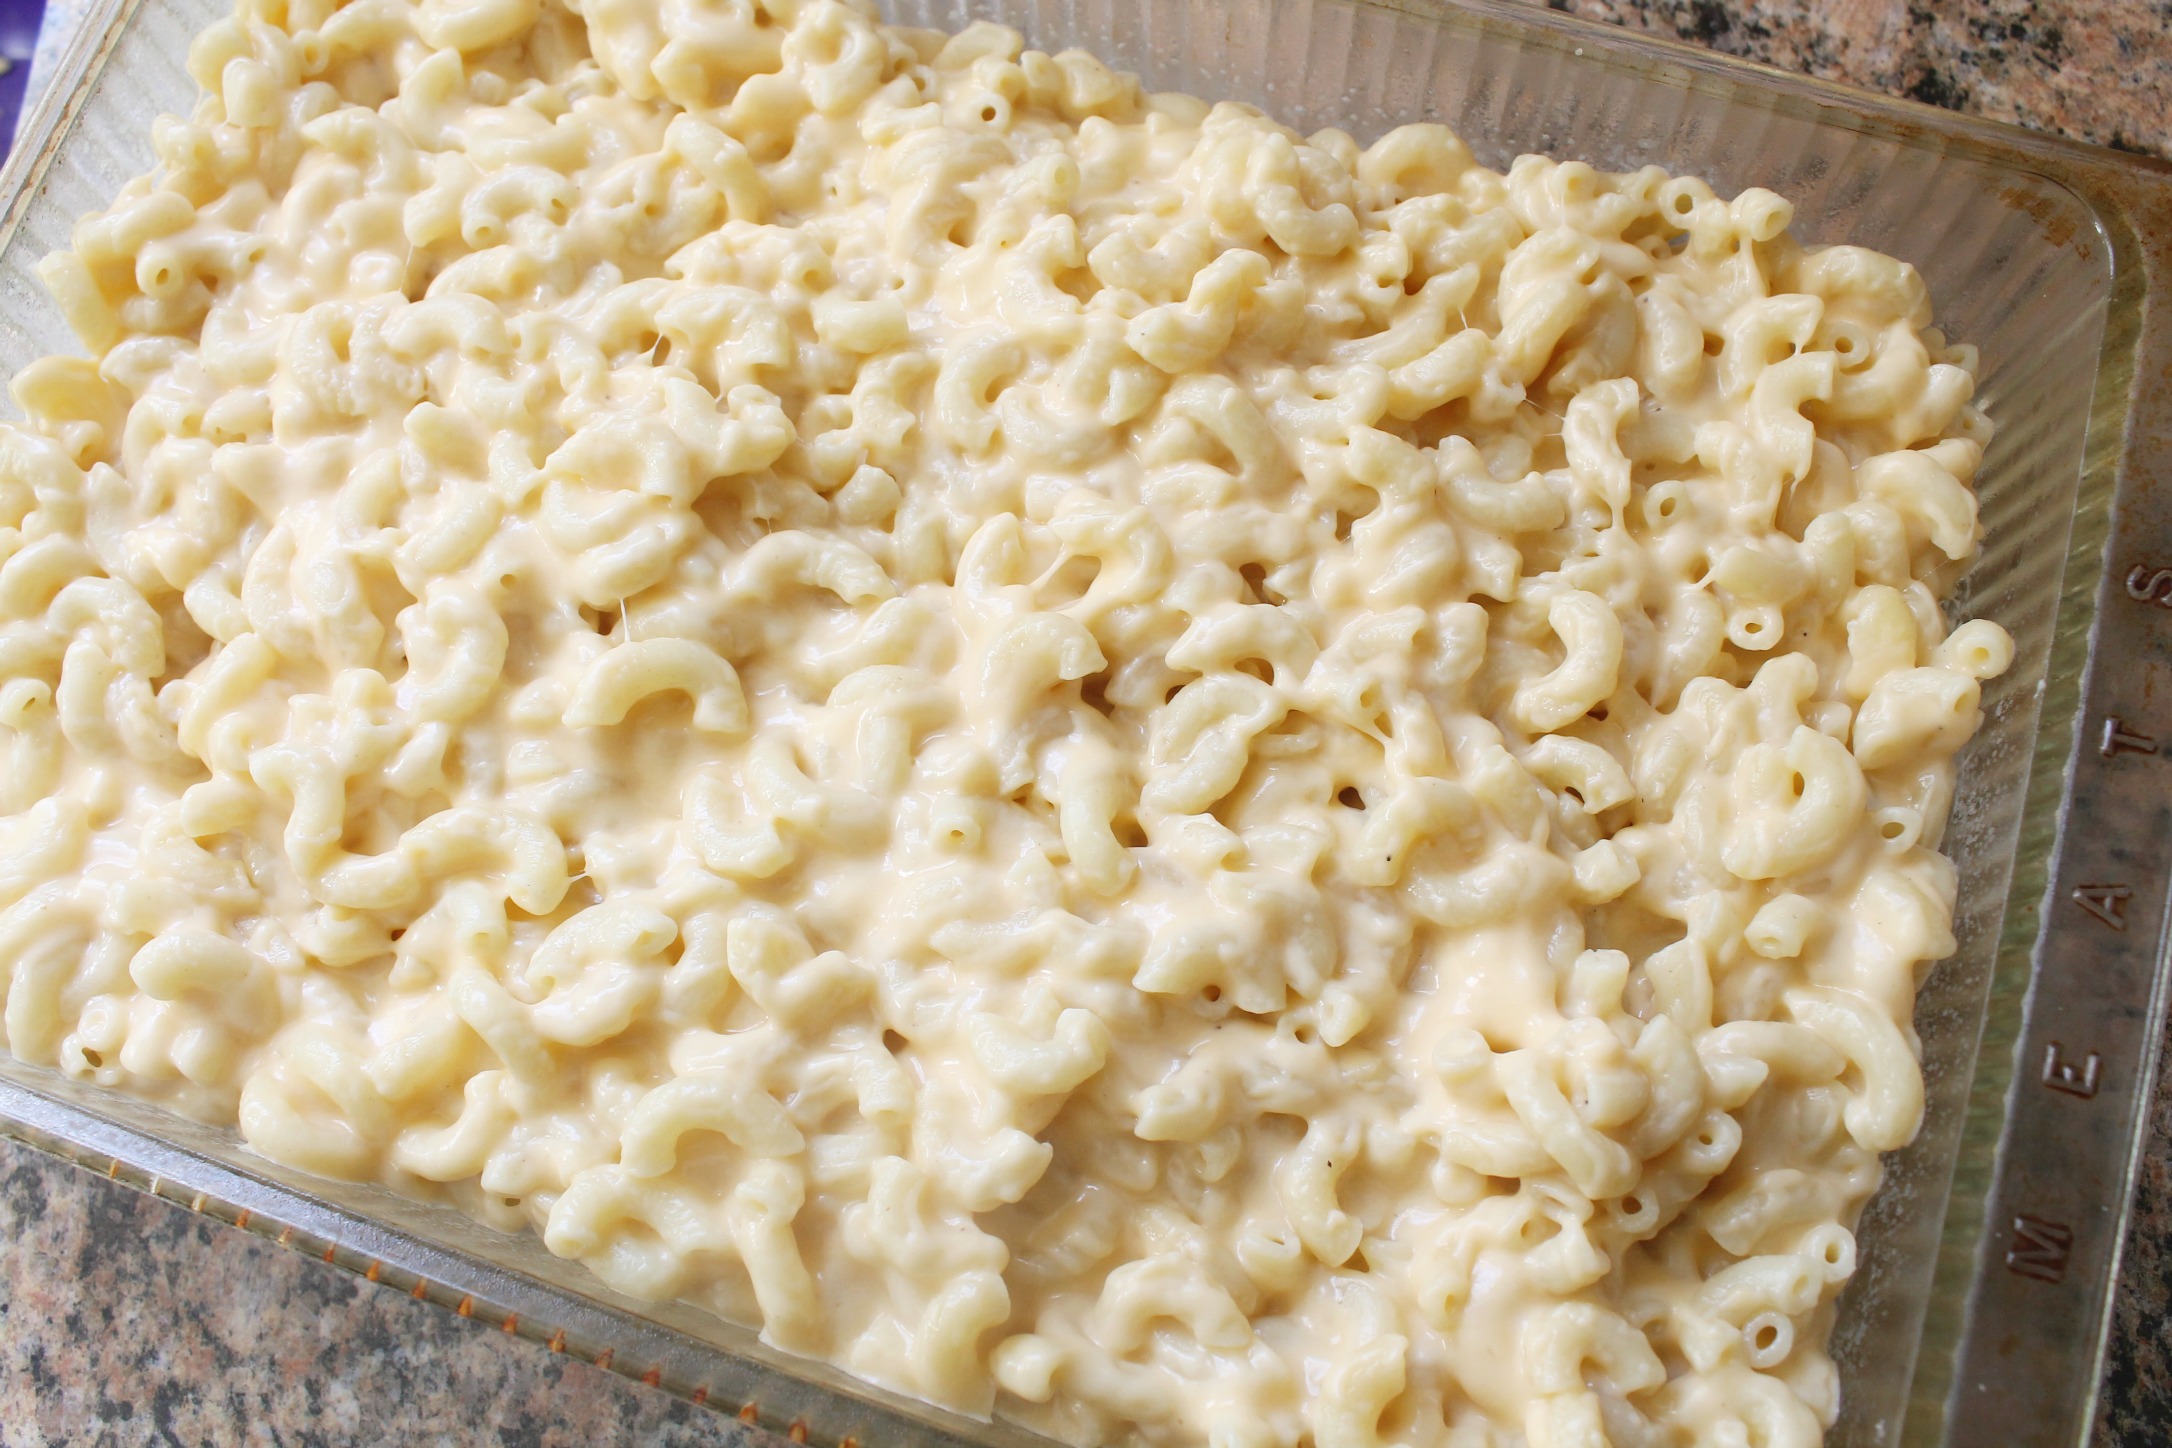
- Remove the cheese sauce from the heat and stir in the cooked macaroni until well combined. Pour into the prepared baking dish.
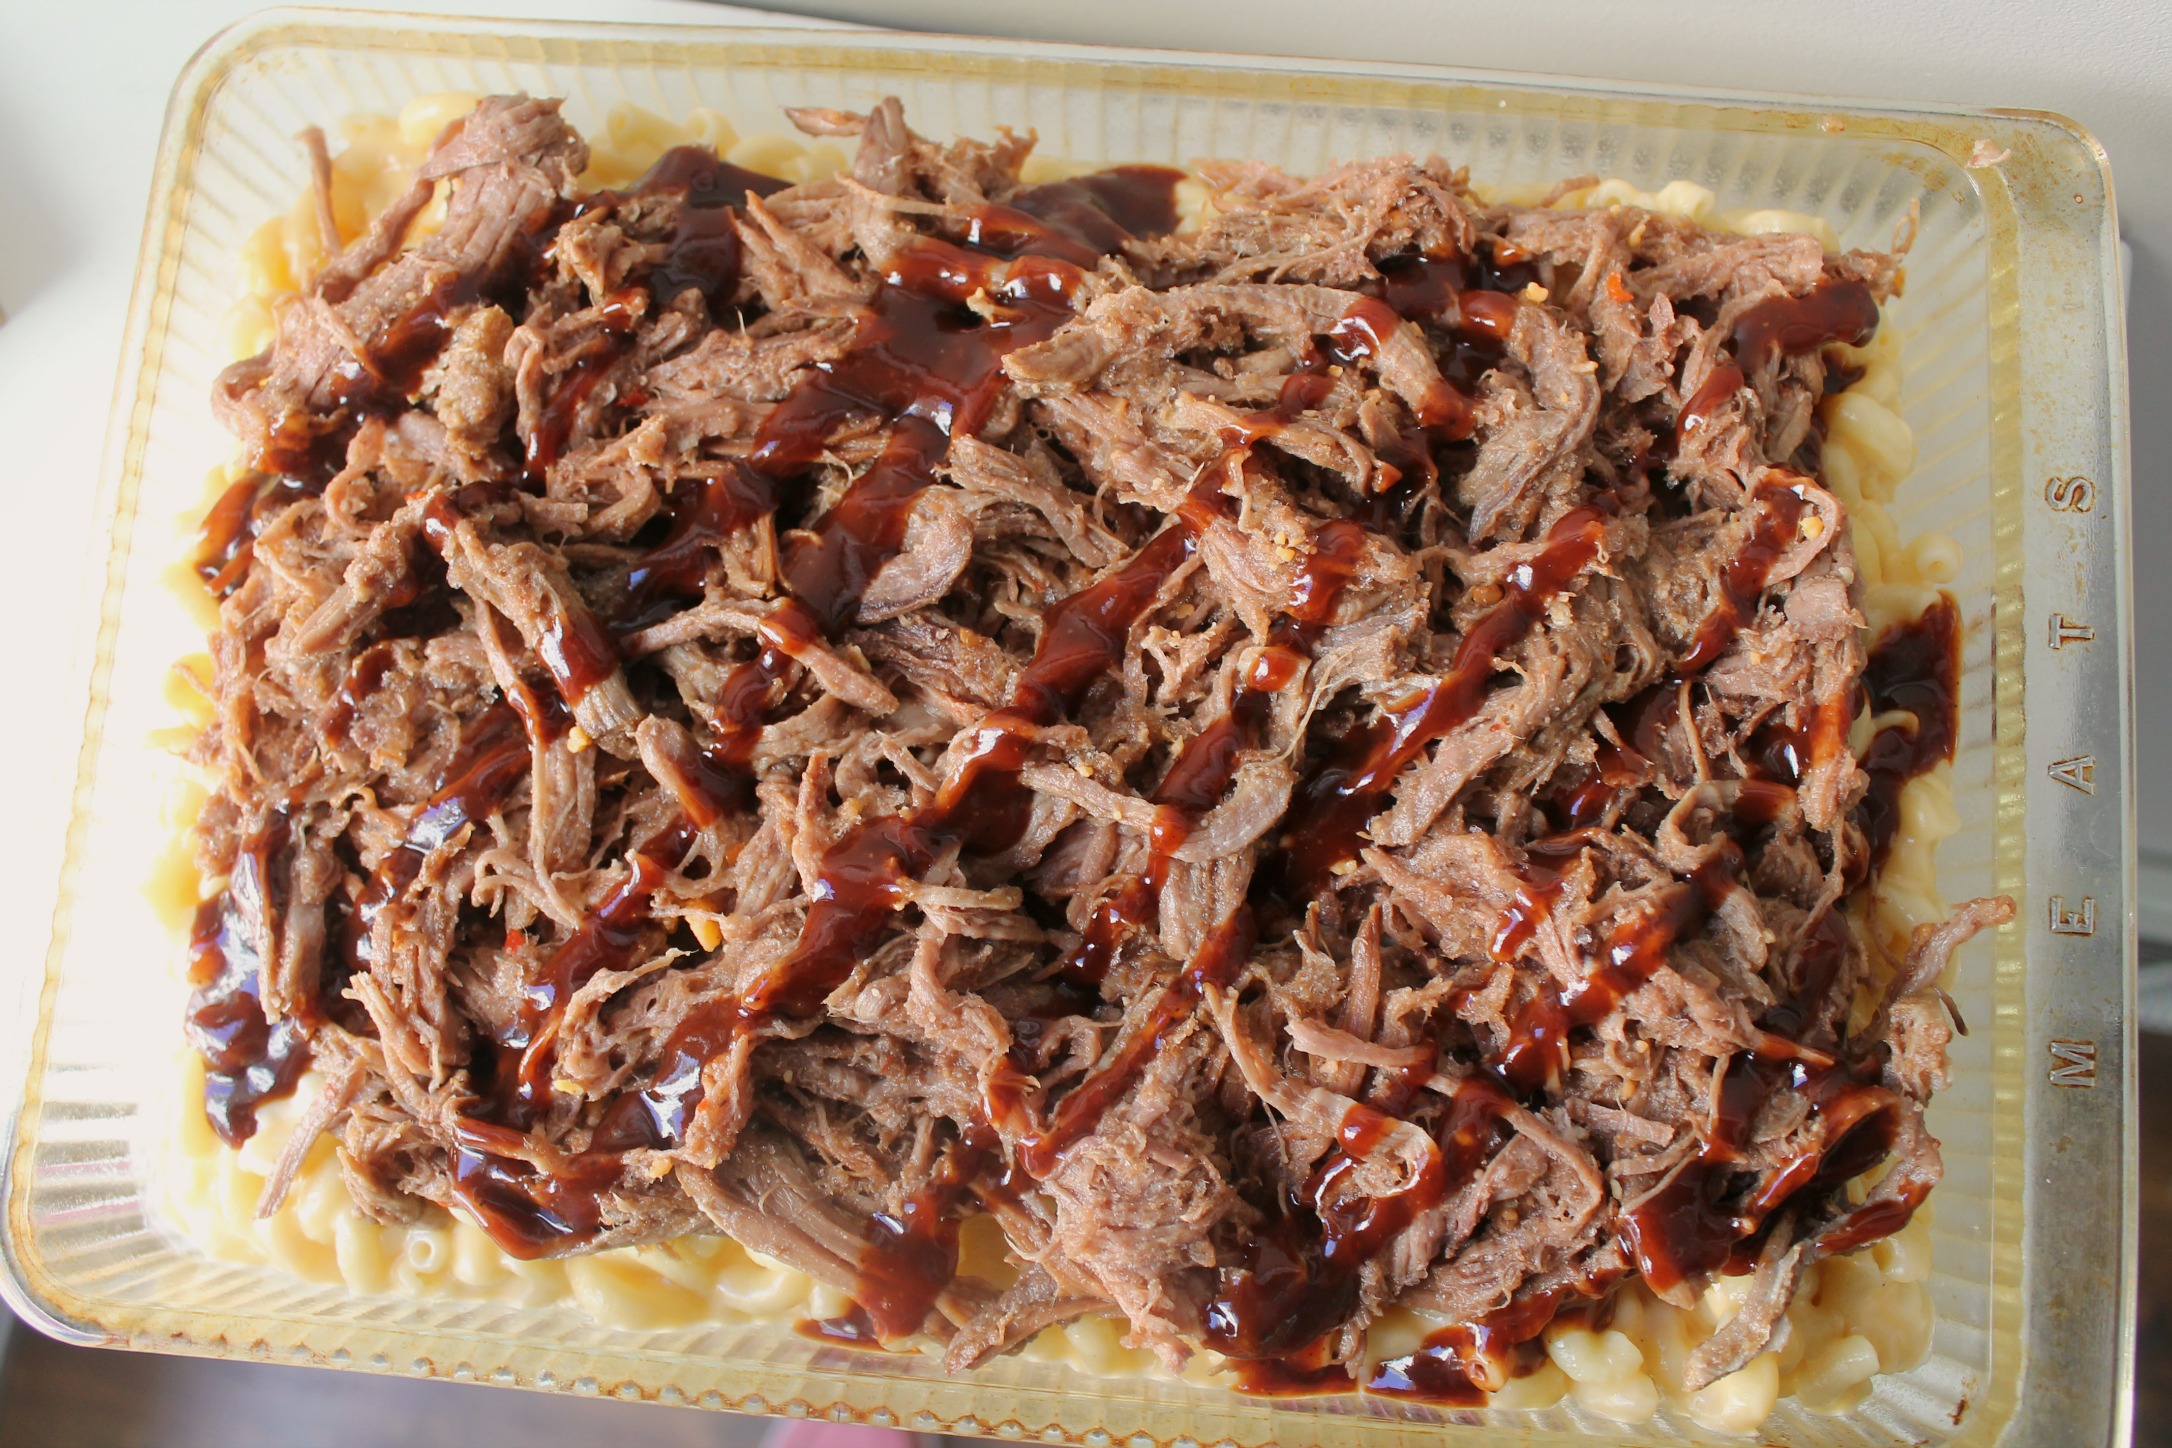
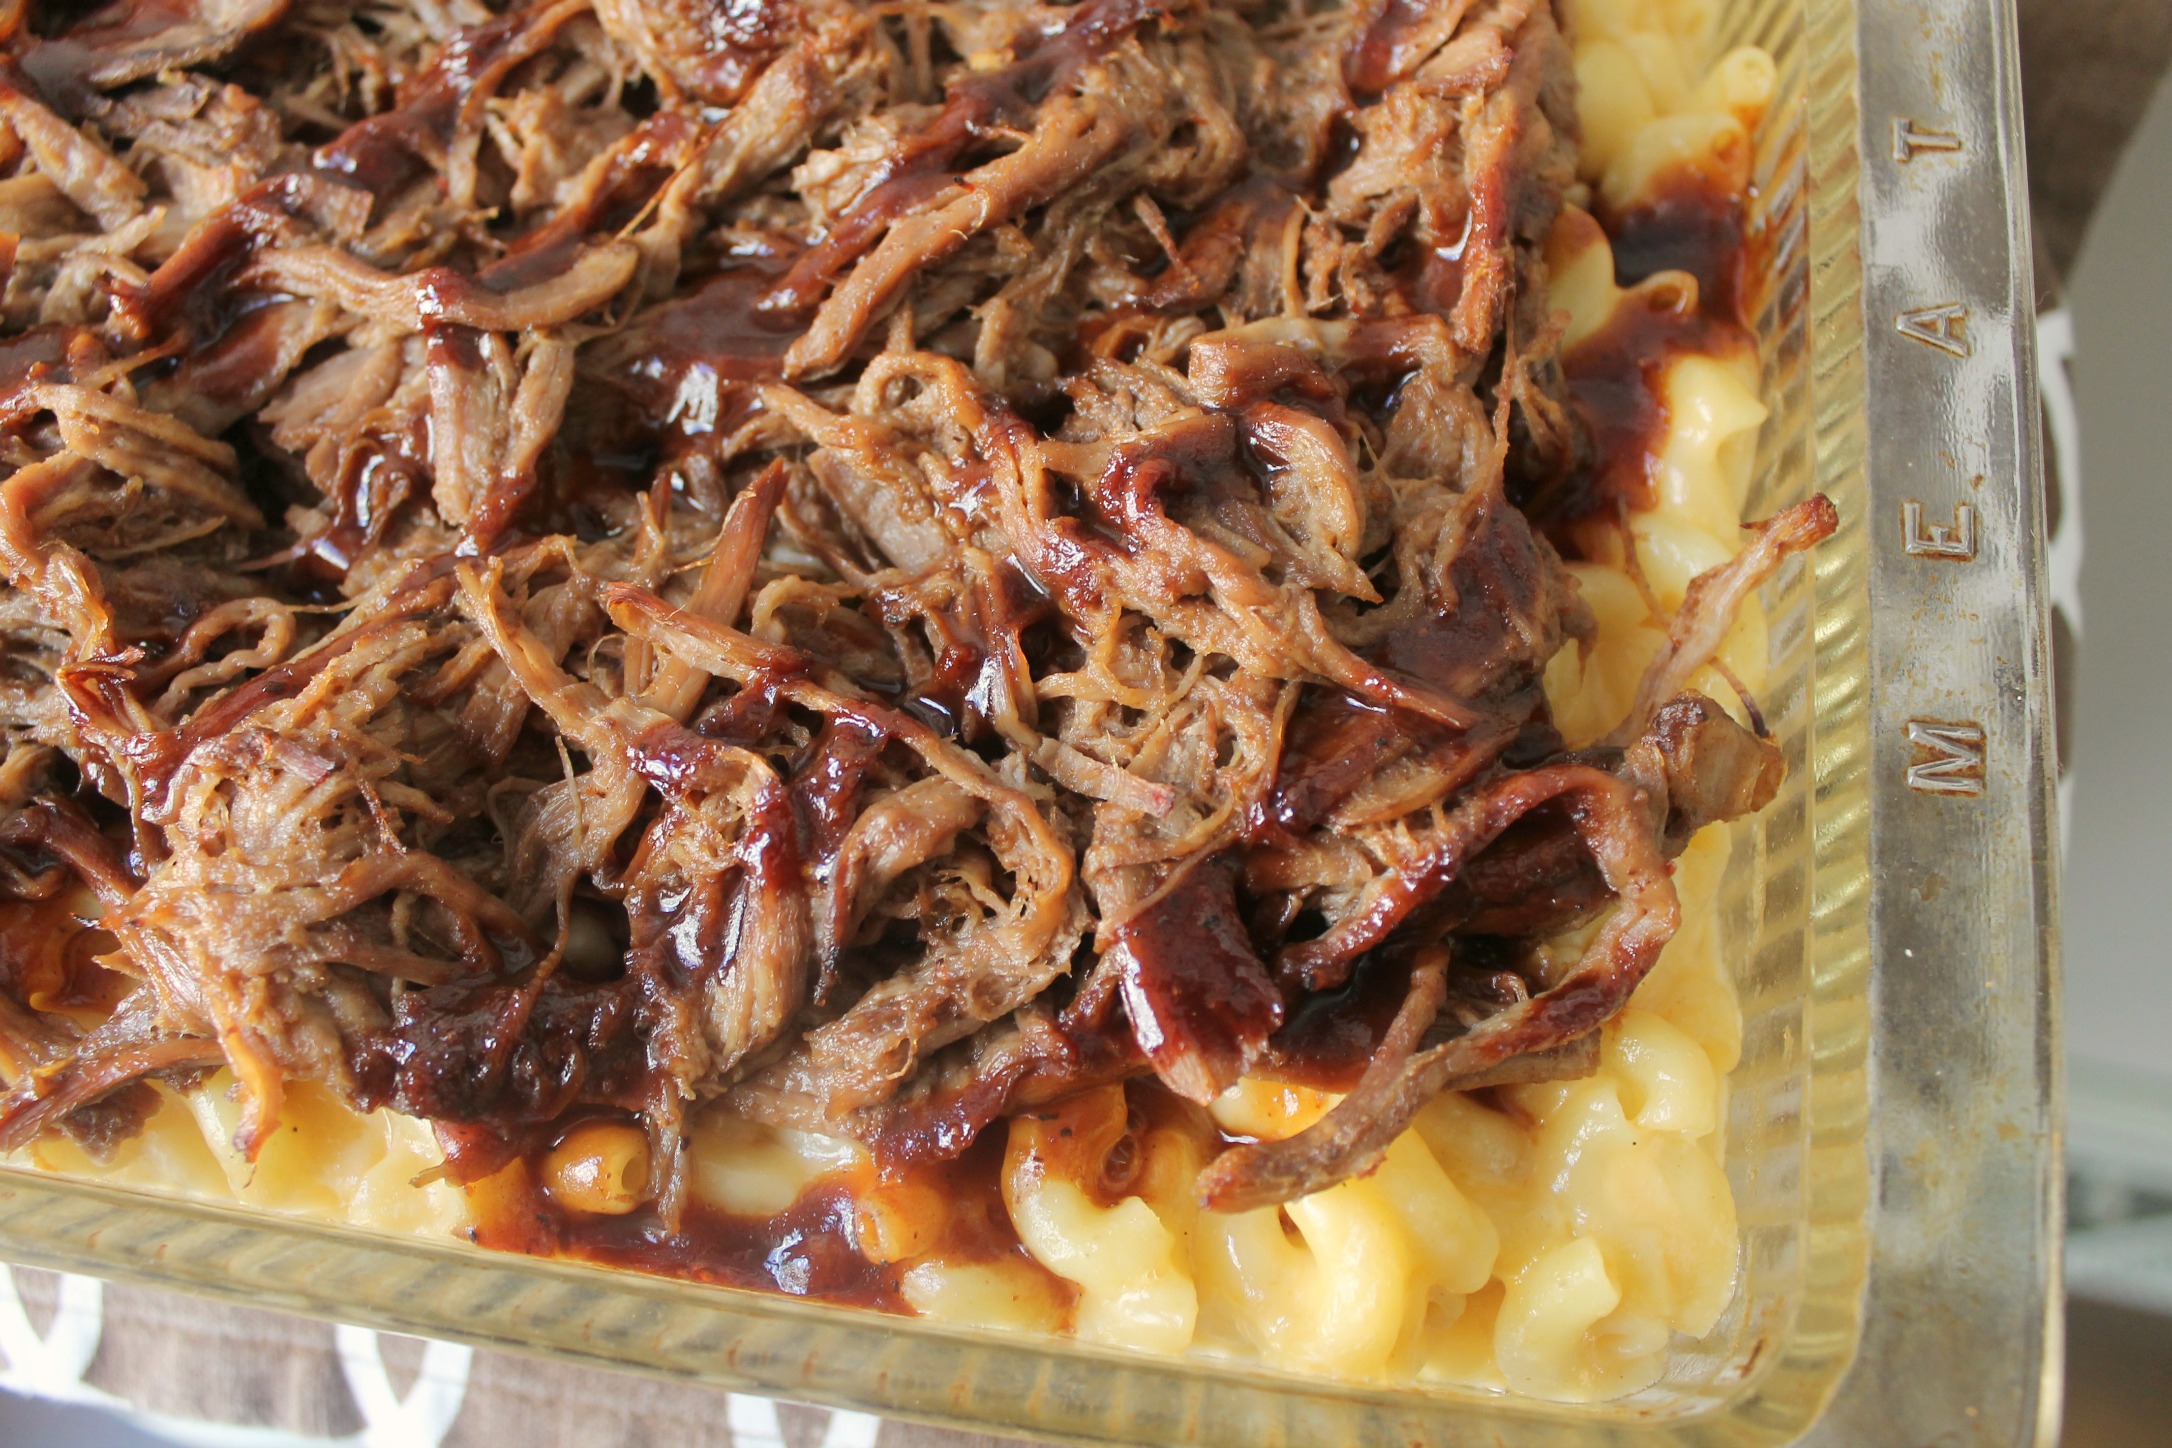
- In a medium bowl, combined the pulled pork with one cup of barbecue sauce. Spread evenly over the macaroni and cheese. Drizzle the remaining barbecue sauce over the top.
- Bake for 15 minutes. Turn the oven to broil and cook for 3 more minutes, keeping a close eye to avoid burning the top.
- Remove from the oven and drizzle with extra barbecue sauce if desired and enjoy!
Best Cheese Combinations for Creamy Mac and Cheese
One of the most important parts of making incredible BBQ pulled pork mac and cheese is choosing the right cheese combination. The type of cheese you use dramatically affects the flavor, texture, creaminess, and overall richness of the final dish.
Cheddar cheese is the classic choice for homemade mac and cheese, but using a blend of cheeses can create a sauce with much deeper flavor. Different cheeses melt differently, so combining them helps create the perfect balance between flavor and texture.
Here are some of the best cheeses to try out in your BBQ Pulled Pork Mac and Cheese:
- Sharp Cheddar: The classic choice that delivers bold flavor and rich color.
- Smoked Gouda: Adds a smoky depth and very creamy texture.
- Monterey Jack: Mild, creamy, and melts beautifully.
- Mozzarella: Great for a stretchy, gooey texture. Very mild flavor.
- Pepper Jack: Adds a little heat and works especially well in a spicy variation of this dish.
- Parmesan: Adds a salty, savory depth that’s especially good sprinkled on top with some breadcrumbs before baking.
- Gruyere: Has a deeply creamy texture and a nutty flavor, making it a perfect pairing for mac and cheese.
No matter which cheeses you choose, combining multiple varieties creates a more balanced, flavorful mac and cheese that tastes homemade and high-quality.
Tips for the Best Mac and Cheese
Making perfectly creamy mac and cheese is easier than most people think, but a few small details often cause mishaps with this dish. Keep these tips in mind as you work through this recipe, and you can consistently make creamy, flavorful homemade mac and cheese.
Don’t Overcook the Pasta
Don’t make the mistake of overcooking the pasta. This will leave you with mushy pasta in the final dish. Since the pasta continues cooking in the oven, it only needs to be cooked until al dente on the stovetop. This is often 1-2 minutes less than the package directions.
You want the pasta to be slightly firm; drain immediately to prevent overcooking. The pasta will finish cooking in the oven, giving it a perfectly cooked texture.
Freshly Shred Your Cheese
Pre-shredded cheese may seem convenient, but it often contains additives that prevent it from melting smoothly. Freshly shredded cheese melts more evenly, creates a silkier sauce, and prevents a grainy texture.
Use a Cheese Blend
Using only cheddar can sometimes create a thick or oily sauce. Combining cheeses improves both flavor and texture.
A balanced blend often includes:
- Sharp cheddar for flavor
- Monterey Jack for creaminess
- Gouda for smoky richness
- Mozzarella for stretchiness
Heat Low and Slow
High heat can cause cheese sauce to separate or become grainy. After making the roux and milk base, lower the heat before adding cheese. The best method is to add the cheese slowly in small handfuls, constantly whisking as it incorporates, and letting it melt in before adding more.
Season the Sauce
Taste the sauce and each element of the dish as you go, and season as needed. This cheese sauce works well with just a bit of salt and pepper, but some of my favorite seasonings to use in baked mac and cheese include:
- Onion Powder
- Garlic Powder
- Paprika/Smoked Paprika
- Ground Mustard
- Nutmeg
Let the Dish Rest Before Serving
Allowing the mac and cheese to rest for 5–10 minutes after baking helps the sauce thicken, improving the dish’s texture.
Can I Use Leftover Pulled Pork?
Leftover pulled pork is actually the reason I came up with this recipe in the first place! It’s one of the best reasons to make this BBQ pulled pork mac and cheese.
If you regularly smoke pork shoulder, cook it in the slow cooker, or order barbecue takeout, this recipe is an easy and delicious way to transform leftovers into a whole new meal. Instead of reheating pulled pork the same way again, mixing it into cheesy baked pasta gives the meat new texture, flavor, and richness, and keeps those tasty leftovers from going to waste!
One of the great things about using leftover pulled pork is that the meat already contains layers of flavor from seasoning, smoke, and barbecue sauce. That extra depth adds incredible flavor to the mac and cheese without requiring much extra effort.
What I love to do is make a big batch of pulled pork using this Instant Pot Pulled Pork recipe and freeze it in freezer-safe bags so I can pull out a portion for recipes like this mac and cheese, or when I need a last-minute dinner idea. It’s seasoned with a deliciously simple dry rub that adds so much flavor to this mac and cheese version.
Tip: If your leftover pulled pork looks dry, mix in spoonful of BBQ sauce or a splash of chicken broth or melted butter to keep the meat tender after baking.
Variations to Try
This is a super simple and fun recipe you can change up based on your preferences. Once you master the basic recipe, there are endless ways to change the flavors, add toppings, or create new variations depending on the occasion and your personal taste preferences.
Whether you prefer spicy foods, smoky barbecue flavors, crunchy toppings, or extra cheesy casseroles, this recipe can be easily adapted to create something unique every time you make it.
Here are some of my favorite variations to try:
- Spicy Mac: Add chopped jalapeños, pepper jack cheese, hot sauce, and cayenne pepper.
- Smoked Mac and Cheese: Use smoked Gouda and smoked paprika.
- Bacon BBQ: Mix chopped, crispy bacon into the mac and cheese and sprinkle extra on top before baking.
- Buffalo Mac and Cheese: A game day favorite (and my personal favorite)! Replace the pulled pork with shredded chicken and the BBQ sauce with buffalo sauce. Mix some blue cheese crumbles into the mac and cheese, then finish the dish with a drizzle of ranch before serving!
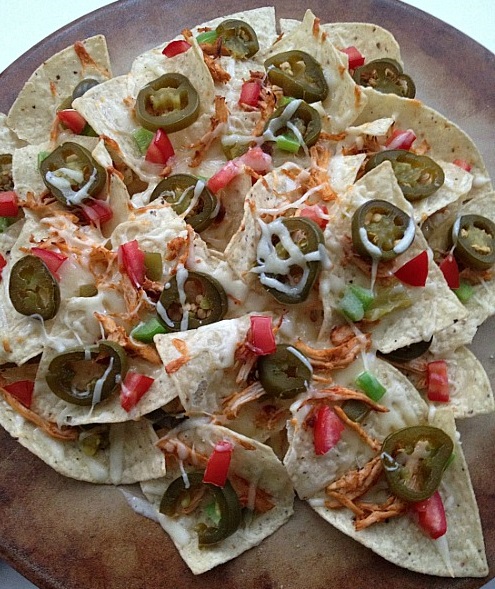
- Tex-Mex Style: Mix in black beans, corn, Rotel tomatoes, and taco seasoning into the mac and cheese. Top it with Tortilla strips, sour cream, and cilantro for a fun twist on this comfort food dish.
No matter which variation you try, the combination of creamy cheese sauce, smoky meat, and tender pasta creates a comforting base that works with almost any flavor addition.
What to Serve with Pulled Pork Mac and Cheese
BBQ Pulled Pork Mac and Cheese is rich, creamy, cheesy, and filling, which means pairing it with the right side dishes can help balance the meal while creating the ultimate comfort-food spread.
Popular foods to serve alongside it include:
- Coleslaw
- Cornbread
- Baked Beans
- Roasted Veggies
- Pickled Veggies
- Salad
- Garlic Bread
Because this dish already contains smoky barbecue flavor and creamy cheese sauce, the best side dishes often add freshness, crunch, acidity, or sweetness to complement the richness.
Storage Tips
Whether you’re meal prepping, saving leftovers, or making the recipe ahead for a party or gathering, proper storage helps maintain the creamy texture and rich flavor.
In the fridge, the pulled pork mac and cheese will keep for up to 4 days. Allow it to cool completely before storing it in an airtight container or wrapping the baking dish tightly with foil or plastic wrap.
When reheating this mac and cheese, you may notice it has thickened a bit. That is because the cheese sauce thickens as it cools. The key to reheating is adding moisture back into the dish.
Whether you’re reheating it in the microwave or the oven, add a splash of milk, chicken broth, or a pat of butter to the plate to mix into the dish as it heats, restoring some of its moisture.
Pulled Pork Mac and Cheese FAQs
For more BBQ questions, leave a comment below!
Can I Make This Ahead of Time?
This recipe works great as a make-ahead casserole, which makes it perfect for holidays, potlucks, and busy weeknights. You can fully assemble the dish ahead of time and refrigerate it before baking. When you’re ready to cook, simply bake the mac and cheese as directed in the recipe card above, adding a few extra minutes if the casserole is cold from the refrigerator.
What’s the Best Pasta for Mac and Cheese?
Short pasta shapes work best because they hold onto the creamy cheese sauce. Elbow macaroni, cavatappi, shells, or penne are all perfect pasta shapes for mac and cheese. But this really is the part where you can have fun and choose your favorite shape!
Can I Use Store-Bought Pulled Pork?
You can absolutely use store-bought pulled pork. This is a great shortcut for busy weeknights that still creates delicious results. If you’re using prepared pulled pork, drain any excess liquid if needed, and adjust the BBQ sauce to your liking.
Why Is My Cheese Sauce Grainy?
Grainy cheese sauce usually happens when cheese overheats or when you use pre-shredded cheese. To avoid this, lower the heat before adding the cheese to the pan, and whisk constantly. As well, buy blocks of cheese and shred them fresh for the recipe.
Can I Make This Without Baking?
Baking is not needed for this recipe at all. In fact, if you prefer a stovetop mac and cheese, simply skip the baking step after combining the ingredients. Since the mac and cheese and the pulled pork are all fully cooked, the baking step adds crispy edges and a thicker casserole texture. But stovetop versions are faster and still delicious!
Wrapping Up
Now you can see why BBQ Pulled Pork Mac and Cheese has become such a popular comfort food. It combines everything people love about homemade mac and cheese with the bold and smoky flavor of barbecue in one incredibly satisfying dish. Between the creamy cheese sauce, tender pasta, juicy pulled pork, and bold sauce, every bite delivers the perfect combination of flavors and textures in this savory comfort food.
What I love most about this recipe is how easy it is to customize. You can swap out the cheeses, add in some new ingredients, or bake it with a crunchy breadcrumb topping to please any crowd. It’s also a fantastic way to use up leftover pulled pork without making the same meal over and over.
Leftover barbecue can sometimes feel repetitive after a few days, but turning it into a creamy baked mac and cheese transforms it into something completely new and exciting. Whether your pulled pork comes from a smoker, slow cooker, Instant Pot, or grocery store, this recipe gives it a second life that tastes just as good (if not better) than the original meal.
If you enjoyed this recipe, be sure to check out some of our other comfort food favorites from the recipe links below. And if you try this recipe, don’t forget to leave a comment and rating below. Hearing how you recipes turn out in your kitchen is always the best part!
More Comfort Food Recipes You’ll Love
Are you looking for more rich and hearty comfort food meal ideas? If so, check out these great dinner and lunch recipes! They’re easy to make and perfect for any occasion.
Get Connected with Cooks!
Did you love this recipe? What’s your favorite way to serve up this beloved BBQ duo? Let us know in the comments below to get connected with other home cooks!