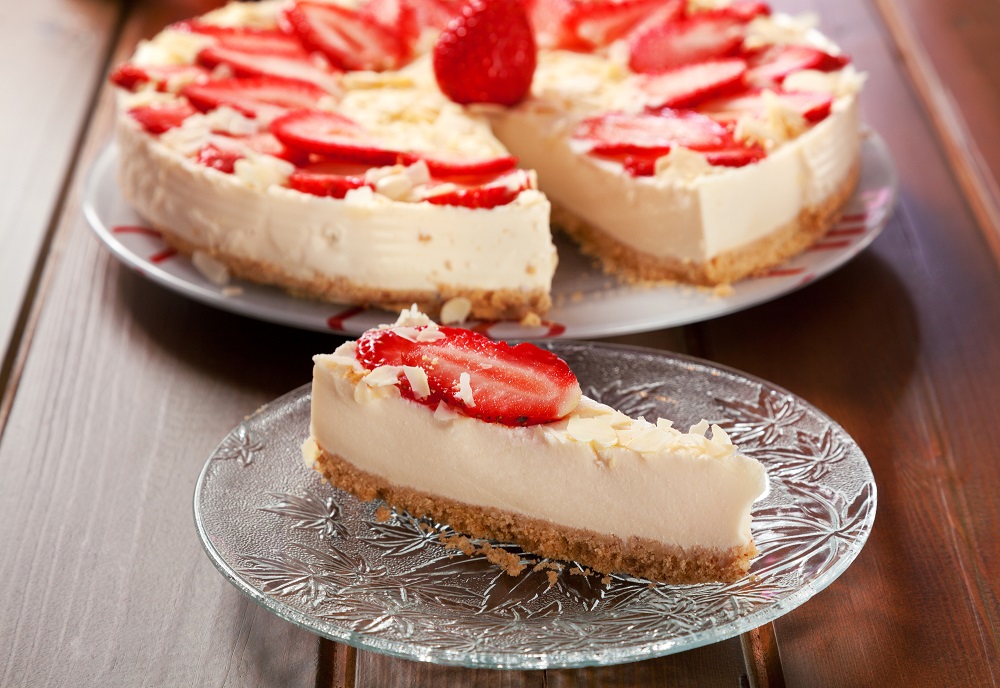
Delve into the world of decadent desserts with this classic Philadelphia cheesecake recipe. Known for its creamy filling and buttery graham cracker crust, this delicious dessert is a staple at many celebratory events, from birthdays to anniversaries.
Its origins date back to ancient Greece, yet it’s become a modern favorite, often customized with various toppings and mix-ins. Perfect for any special occasion, this cheesecake can be frozen or served chilled, adorned with options like a cool whip or chocolate sauce.
Table of Contents
Prepare it overnight before serving to allow the flavors
to meld, ensuring each slice is as indulgent as the last. Whether it’s a homemade crust or a simple no-bake vanilla cheesecake, the versatility of this recipe makes it suitable for both novice bakers and seasoned pastry chefs.
Ingredients
- 1 ½ cups of granulated sugar
- 3 tablespoons sugar
- 4 packages of cream cheese
- 1 teaspoon vanilla
- 4 eggs
- 2 cups of shortbread biscuits or buttery graham cracker crumbs
- ½ cup butter or margarine melted
- Powdered sugar, as needed for optional dusting
- Fresh fruit or favorite fruit toppings (optional)
Instructions
Step 1: Preheat the Oven
Begin by preheating the oven to 325°F (165°C).
Step 2: Mix the Ingredients
Gather your ingredients and Combine the graham crumbs, 3 tablespoons sugar, and the melted butter in a mixing bowl, and press the mixture firmly into the bottom of a 9-inch springform pan.
In a separate mixing bowl, beat cream cheese on medium speed until smooth, and then gradually add 1 ½ cups granulated sugar and 1 teaspoon vanilla, mixing on low speed until well blended. Add eggs, one at a time, ensuring each is incorporated into the cream cheese mixture before adding the next.
Step 3: Pour Over Crust
Once your creamy cheesecake filling is smooth, carefully pour it over the crust in the pan.
Step 4: Bake
Bake the cheesecake for 55 minutes or until the center is almost set. Allow the cheesecake to cool slowly in the oven with the door ajar to help prevent cracks.
Step 5: Refrigerate
Afterward, refrigerate the cheesecake for 4 hours before serving.
Step 6: Serving
To serve, loosen the cake from the rim of the pan with a sharp knife and cool before removing the rim completely. Top with fresh fruit, caramel sauce, or your favorite fruit for an extra touch of sweetness.
Optional Additions/Variations
For those looking to personalize their cheesecake, consider a variety of optional additions and variations. Mix in chocolate chips or swirls of chocolate sauce into the batter for a chocolate twist, or substitute the classic graham cracker base with biscuit crumbs for a different texture.
For a tangy flavor, add a swirl of lemon curd. Dietary substitutions are also possible: low-fat cream cheese for a lighter version or a gluten-free biscuit alternative for the crust to accommodate dietary restrictions.
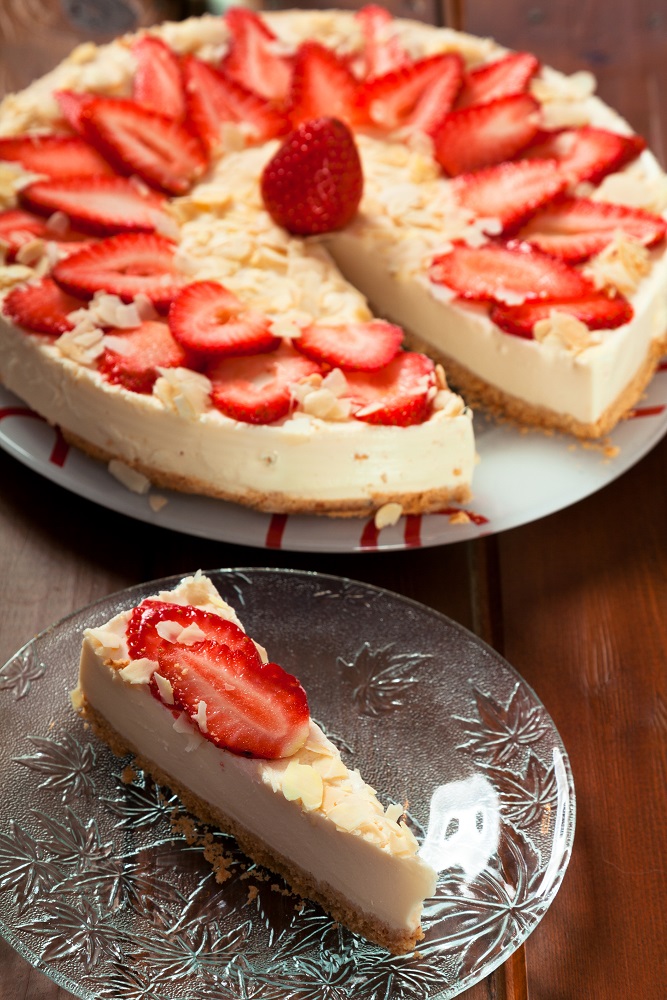
Adventurous bakers might try flavor variations such as strawberry cheesecake with fresh strawberry sauce, a Biscoff cheesecake with crushed Biscoff biscuits, and a dusting of powdered sugar.
A Philadelphia no-bake cheesecake recipe can be a delicious no-bake alternative for those avoiding the oven.
Cooking Tips
For a successful cheesecake, ensure all ingredients, especially cream cheese and eggs, are at room temperature before beginning. This helps achieve a smoother, more homogeneous cream cheese mixture and reduces the risk of lumps.
When mixing, do so at medium speed to avoid incorporating too much air, which can cause the cheesecake to crack. After baking, allow the cheesecake to cool slowly and set correctly to avoid cracks and ensure the ideal creamy texture.
For slicing, use a sharp knife dipped in hot water and wiped dry between cuts for clean slices. To prevent overbaking, which can lead to a dry cheesecake, check for doneness when the center is almost set but still slightly wobbly.
If you have an instant-read thermometer, the internal temperature should reach about 150°F (65°C). Lastly, wrapping the bottom of the springform pan in heavy-duty aluminum foil can help protect against water if using a water bath method.
Equipment Needed
- 9-inch springform pan or pie pan
- Mixing bowls
- Electric mixer
- Measuring cups and spoons
- Rolling pin (for crushing biscuits if not using pre-made crumbs)
- Sharp knife
- Heavy-duty aluminum foil (optional for water bath)
Preparation Time
Preparing a Philadelphia cheesecake begins with assembling the ingredients and preparing the crust, which takes about 20 minutes. The filling requires an additional 15 minutes of preparation time.
Baking the cheesecake typically takes around 55 minutes. After baking, it’s crucial to allow the cheesecake to cool in the oven for approximately 1 hour before transferring it to the refrigerator for a chill time of at least 4 hours before serving. Including the cooling and chilling time, the total time from start to finish is roughly 6 hours and 30 minutes.
For a no-bake variation, expect to spend 10 minutes preparing the crust and another 10 minutes preparing the filling.
The no-bake cheesecake will then need to be set in the refrigerator for a minimum of 4 hours before serving, bringing the total preparation time to around 4 hours and 20 minutes. Always account for additional time if adding garnishes or elaborate toppings.
Serving Suggestions
Philadelphia cheesecake is best served chilled, making it a refreshing end to any meal. For a visually appealing presentation, top slices with fresh fruit such as strawberries and blueberries or a drizzle of fruit compote for added flavor and color.
Complementary side dishes could include a light salad or a cup of coffee to balance the richness of the cheesecake. For beverages, consider a dessert wine or a glass of sparkling water with a twist of lemon to cleanse the palate.
During the holiday season, you might opt for festive garnishes like crushed peppermint or a dusting of cocoa powder. Pair the cheesecake with a scoop of sorbet or fresh lemonade for a summer gathering. Remember, the key to a great dessert experience is the taste, presentation, and pairing that elevate the overall enjoyment.
Storage Instructions
Proper storage is essential for maintaining the quality of your Philadelphia cheesecake. Cover the cheesecake tightly in plastic wrap to store leftovers and place it in an airtight container.
Store in the refrigerator for up to 5 days. If you wish to freeze the cheesecake, wrap it tightly in plastic wrap, then in heavy-duty aluminum foil, and freeze for up to 2 months. Thaw overnight in the refrigerator before serving.
Recipe Notes
Depending on your preference, this creamy cheesecake can be made using either full-fat or low-fat cream cheese. However, full-fat cream cheese will yield a richer and creamier texture.
Be mindful of the oven temperature; fluctuations can cause the cheesecake to crack or bake unevenly. For best results, placing the cheesecake in the refrigerator overnight is recommended to set it completely and develop the flavors fully.

Classic Philly-Style Cheesecake Recipe: A Creamy and Rich Delight
Equipment
- 9-inch springform pan or pie pan
- Mixing bowls
- Electric mixer
- Measuring cups and spoons
- Rolling pin (for crushing biscuits if not using pre-made crumbs)
- Sharp knife
- Heavy-duty aluminum foil (optional for water bath)
Ingredients
- 1 ½ cups of granulated sugar
- 3 tablespoons sugar
- 4 packages of cream cheese
- 1 teaspoon vanilla
- 4 eggs
- 2 cups of shortbread biscuits or buttery graham cracker crumbs
- ½ cup butter or margarine melted
- Powdered sugar, as needed for optional dusting
- Fresh fruit or favorite fruit toppings (optional)
Instructions
Step 1: Preheat the Oven
- Begin by preheating the oven to 325°F (165°C).
Step 2: Mix the Ingredients
- Gather your ingredients and Combine the graham crumbs, 3 tablespoons sugar, and the melted butter in a mixing bowl, and press the mixture firmly into the bottom of a 9-inch springform pan. In a separate mixing bowl, beat cream cheese on medium speed until smooth, and then gradually add 1 ½ cups granulated sugar and 1 teaspoon vanilla, mixing on low speed until well blended. Add eggs, one at a time, ensuring each is incorporated into the cream cheese mixture before adding the next.
Step 3: Pour Over Crust
- Once your creamy cheesecake filling is smooth, carefully pour it over the crust in the pan.
Step 4: Bake
- Bake the cheesecake for 55 minutes or until the center is almost set. Allow the cheesecake to cool slowly in the oven with the door ajar to help prevent cracks.
Step 5: Refrigerate
- Afterward, refrigerate the cheesecake for 4 hours before serving.
Step 6: Serving
- To serve, loosen the cake from the rim of the pan with a sharp knife and cool before removing the rim completely. Top with fresh fruit, caramel sauce, or your favorite fruit for an extra touch of sweetness.
Notes
- Depending on your preference, this creamy cheesecake can be made using either full-fat or low-fat cream cheese. However, full-fat cream cheese will yield a richer and creamier texture.
- Be mindful of the oven temperature; fluctuations can cause the cheesecake to crack or bake unevenly. For best results, placing the cheesecake in the refrigerator overnight is recommended to set it completely and develop the flavors fully.