Chocolate pudding ice cream has the rich chocolate flavor of pudding with the cold, scoopable texture of homemade ice cream. This version is vegan and gluten-free, made with coconut milk, Dutch-process cocoa, cane sugar, agave, and a little salt.
The name can be confusing, though. This recipe does not use instant chocolate pudding mix. The pudding-like quality comes from the rich chocolate flavor and creamy texture of the finished ice cream.
Table of Contents
You’ll blend the base, chill it, churn it in an ice cream maker, and then freeze it until firm. You’ll need an ice cream maker for this version, but the hands-on preparation is simple.

Below, you’ll find the full recipe, substitution tips, troubleshooting help, and everything you need for the creamiest texture.
Why You’ll Love This Recipe
This recipe uses just a few ingredients to create a rich, chocolate-forward vegan ice cream with a creamy coconut-milk base.
Want our human-written content to rank above AI-generated garbage? Help us out by clicking this button!
- Rich chocolate flavor from Dutch-process cocoa
- Creamy dairy-free base from coconut milk
- Naturally vegan
- Made without gluten-containing ingredients
- Optional espresso powder for deeper chocolate flavor
- Simple ingredient list
- Churns to a soft-serve consistency before freezing firm
The recipe is also easy to plan around. You can prepare and chill the base the night before, then churn and freeze it the next day.
If you like making frozen desserts at home, you might also enjoy these Strawberry Ice Cream Sandwiches or check out 25 Best Vegan Ice Cream Recipes.
Only 6 Ingredients You Need
These are the simple ingredients I used for this chocolate pudding ice cream:
- Dutch-process cocoa powder
- Canned coconut milk
- Cane sugar
- Agave syrup
- Sea salt
- Espresso powder, optional
Ingredients and Substitution Notes
Each ingredient has a specific job in this chocolate pudding ice cream, from building the chocolate flavor to controlling the texture once it freezes. Here’s what to use and what to expect if you make a substitution.
- Dutch-Process Cocoa Powder: Provides the rich chocolate flavor and dark color. Its lower acidity gives the ice cream a smoother chocolate taste than natural cocoa. Substitute: Natural cocoa will work, but it may produce a lighter color and a slightly more acidic flavor. For the most predictable result, use Dutch-process cocoa as written.
- Canned Coconut Milk: Provides the creamy dairy-free base for the ice cream. Substitute: Keep the canned coconut milk as written unless you have tested another product. Different plant milks can change the fat and water content, which can affect the final texture.
- Cane Sugar: Adds sweetness and helps control how hard the ice cream becomes in the freezer. Sugar lowers the freezing point, so reducing it can make homemade ice cream noticeably harder. Substitute: Don’t reduce or replace it unless you’re prepared for a change in texture.
- Agave Syrup: Adds additional sweetness and contributes to the texture of the frozen base. Substitute: I don’t recommend substituting a different liquid sweetener, as it may alter the sweetness and consistency.
- Espresso Powder: Optional, but useful when you want a deeper chocolate flavor. It shouldn’t make the finished ice cream taste like coffee. Substitute: Leave it out if you don’t have it.
- Sea Salt: Balances the sweetness and helps the chocolate flavor taste fuller.
If you’re ready for another chocolate-forward frozen dessert, try this Double Chocolate Chip Cookie Dough Vegan Ice Cream.
My Personal Experience with This Recipe
I made this chocolate pudding ice cream with an ice cream maker, and the results are worth sharing because the coconut milk does not overpower the chocolate. I noticed a slight coconut flavor, but it blended well with the rich cocoa. My husband, who doesn’t usually like coconut, enjoyed the finished ice cream too.
I also found that properly chilling and freezing the mixture is essential for achieving the right texture. The base needs to be cold before it goes into the ice cream maker, and the freshly churned ice cream is still soft, so I freeze it until firm before serving. This aligns with how freezing temperature and speed affect the texture of homemade ice cream.

RECIPE CARD: Vegan Chocolate Pudding Ice Cream (PRINTABLE)
Ingredients
- 2½ ounces premium Dutch-process cocoa powder, weighed
- 2½ cups coconut milk, canned
- ¼ cup cane sugar
- ½ cup agave syrup
- Pinch of sea salt
- 2 Tablespoons espresso powder, optional
Instructions
- Sift the Cocoa: Sift the Dutch-process cocoa powder into a bowl to break up any compacted lumps.
- Blend the Base: Add the coconut milk, cane sugar, agave syrup, sea salt, and espresso powder (if using) to a blender. Add the cocoa and blend until completely smooth.Use a high-speed or immersion blender to mix.
- Chill the Base: Refrigerate the chocolate mixture for at least 1 hour or overnight.
- Churn the Ice Cream: Pour the chilled base into your prepared ice cream maker and churn for 10–15 minutes. The mixture should reach a soft-serve consistency.
- Freeze Until Firm: Transfer the churned ice cream to a wide, shallow freezer-safe container. Smooth the surface, cover, and freeze for at least 5–6 hours.
- Serve: If the ice cream is too firm to scoop, let it sit at room temperature for 5–10 minutes before serving.
Notes
- Weigh the cocoa powder for a more consistent result.
-
Cover and refrigerate the base overnight before churning.
- Follow your ice cream maker manufacturer’s instructions.
- The ice cream will be soft after churning and firmer after freezing.
- The blended base is completely smooth.
- The chilled base is thoroughly cold.
- The churned mixture has a soft-serve consistency.
- The ice cream holds its shape when scooped.
- Freezer: Store in an airtight container and use within two weeks for best quality. The ice cream is best when fresh.
- Before serving: Let it soften for 5–10 minutes if needed.
- Make Ahead: Prepare the base up to a day ahead, then churn and freeze.
Nutrition
How to Make Chocolate Pudding Ice Cream
Follow the steps below to achieve the best texture at each stage.
Essential Kitchen Tools
You’ll need:
Step 1: Sift the Cocoa
Sift the Dutch-process cocoa powder into a bowl. This breaks up compacted cocoa and helps prevent stubborn lumps when you blend the base.
Step 2: Blend the Coconut Milk Mixture
Add the canned coconut milk, cane sugar, agave syrup, sea salt, and optional espresso powder to a blender. Blend until the mixture is well combined and the sweeteners are incorporated.
Step 3: Add the Cocoa
Add the sifted cocoa powder and blend until completely smooth. The finished base should have no visible cocoa clumps.
Step 4: Chill the Base
Transfer the chocolate mixture to the refrigerator and chill for at least 1 hour, or overnight.
Don’t skip this step. A thoroughly chilled base freezes better, and overnight chilling is commonly recommended for homemade ice cream.
Step 5: Churn the Ice Cream
Before starting, make sure your ice cream maker is prepared according to the manufacturer’s instructions. If your machine uses a freezer bowl, it needs to be completely frozen before churning.
Pour the chilled base into the machine and churn following the manufacturer’s instructions. For this recipe, churning usually takes 10–15 minutes.
The mixture should look like soft serve when it’s ready.
Step 6: Transfer and Freeze
Transfer the churned ice cream to a wide, shallow freezer-safe container. Smooth the surface, cover tightly, and freeze for at least 5–6 hours.
A shallow container gives freshly churned ice cream more surface area to freeze, while keeping it covered helps protect the texture during storage.
Step 7: Soften Before Serving
If the ice cream is very firm, let it sit at room temperature for about 5–10 minutes before scooping. Homemade ice cream can become quite firm after several hours in the freezer, so a short rest can make scooping easier.

Troubleshooting Tips
Homemade ice cream can change noticeably depending on how cold the base is, how quickly it freezes, and how long it stays in the freezer. These are the most common texture and flavor issues to check first.
- Too Hard: Sugar lowers the freezing point, so reducing cane sugar or agave can make the ice cream harder. Longer freezer storage can also make homemade ice cream firm up considerably. Let it sit at room temperature for 5–10 minutes before scooping.
- Icy Instead of Creamy: Chill the base thoroughly before churning, and prepare your ice cream maker according to the manufacturer’s instructions. Slow freezing, inadequate churning, ingredient substitutions, or poor freezer conditions can lead to larger ice crystals and a less creamy texture.
- Not Thickening in the Ice Cream Maker: Make sure the base is cold enough and, if your machine uses a freezer bowl, that the bowl is completely frozen. A warm kitchen, an under-frozen bowl, or a machine that takes too long to churn can slow the freezing process. Always follow your machine’s instructions for the expected churn time.
- Too Much Coconut Flavor: Coconut milk is the base of this recipe, so some coconut flavor is possible. Dutch-process cocoa provides a strong chocolate flavor, but how noticeable the coconut taste is will vary depending on the coconut milk and your palate. There isn’t a tested substitution here that eliminates it.
- Texture Changes After A Few Days: Homemade ice cream can become harder or icier during storage. Store it in an airtight container and keep it tightly sealed, as air exposure affects texture over time.
Do you enjoy homemade dairy-free ice cream? Try our creamy Dairy-Free Matcha Chip Ice Cream next.
Toppings & Serving Ideas
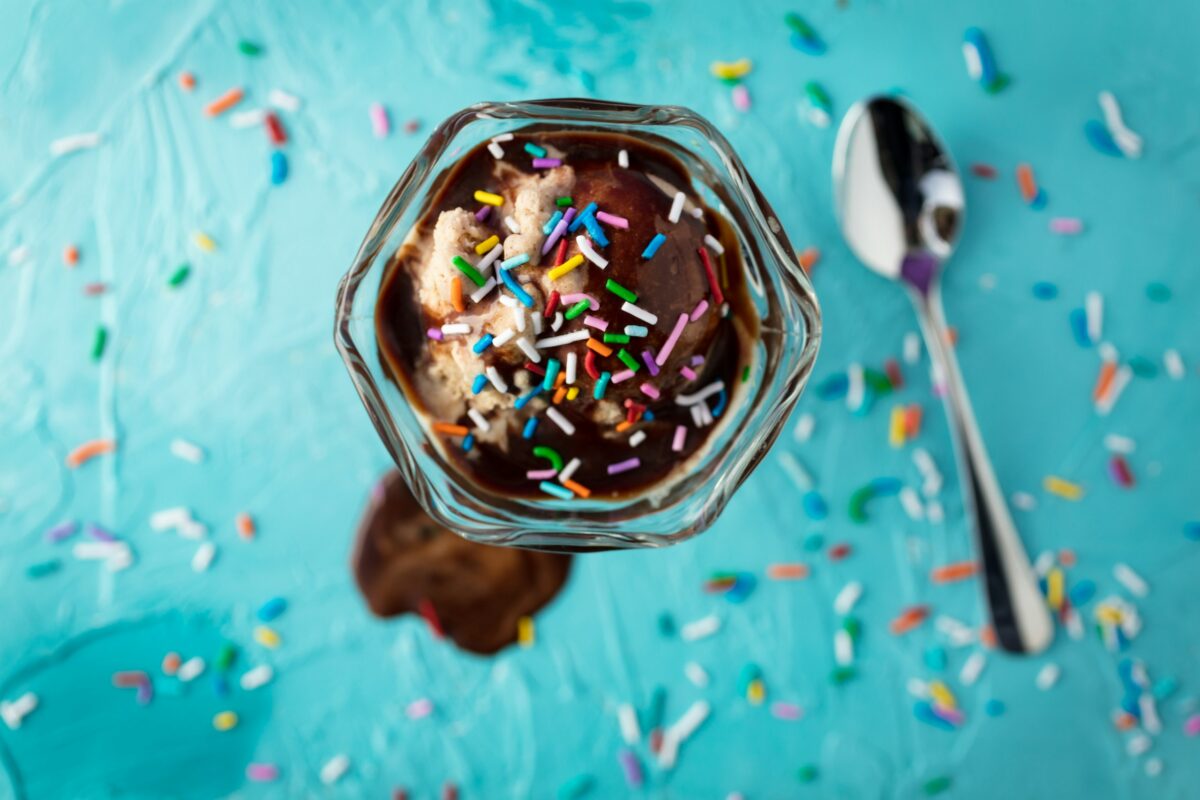
Once the chocolate pudding ice cream is firm and scoopable, a few simple toppings can add contrast without covering up the chocolate flavor. Crunchy toppings such as nuts, cacao nibs, and toasted coconut are especially useful for adding texture to a soft dessert.
- Shaved dark chocolate: Adds a concentrated chocolate flavor and a little texture.
- Cacao nibs: Provide a crisp, slightly bitter chocolate contrast.
- Vegan chocolate sauce: Adds extra sweetness and a softer chocolate layer.
- Toasted coconut: Adds crunch while reinforcing the coconut in the ice cream base.
- Chopped nuts: Add a salty, crunchy contrast to the creamy ice cream.
- Fresh berries: Their acidity helps balance the richness of chocolate.
For an easy dessert pairing, serve a scoop with fresh berries and shaved chocolate, or keep it simple with toasted coconut and cacao nibs. If you want another creamy dairy-free dessert, try this Strawberry Banana Super Whip (Creamy Dairy-Free Dessert).
Make-Ahead & Storage
This chocolate pudding ice cream is easy to make ahead because you can prepare the base before churning. The key is to keep the base cold and give the finished ice cream enough time to firm up in the freezer.
Can I Make the Base Ahead?
Of course, you can. The easiest approach is to split the recipe across two days:
- The night before: Blend the ice cream base and refrigerate it overnight.
- The next day: Pour the thoroughly chilled base into the prepared ice cream maker and churn according to the manufacturer’s instructions.
- 5–6 hours before serving: Transfer the churned ice cream to a freezer-safe container, cover it, and freeze until firm.
- Before serving: If it is too firm to scoop easily, let it sit at room temperature for a few minutes. Homemade ice cream commonly becomes harder after several hours in the freezer.
How to Store It
Store the ice cream in an airtight, freezer-safe container, preferably one that is wide and shallow enough to make scooping easier. Keep the surface covered to limit air exposure and help protect the texture during storage.
Our recipe recommends storing it for up to a couple of weeks, although it is best when fresh. Do not extend that storage recommendation without retesting the recipe.
How Do I Get the Creamiest Texture?
A few details make the biggest difference:
- Chill the Base Thoroughly: Chilling the base before churning helps it freeze faster in the machine and reduces ice crystal growth.
- Churn Only Until Soft-Serve Consistency: The ice cream maker starts the freezing process, but the freezer finishes it.
- Use a Wide, Shallow Container: This helps the churned ice cream freeze efficiently.
- Keep It Covered: An airtight container helps protect the ice cream during storage.
- Expect Some Firming: Homemade ice cream lacks the special ingredients and industrial freezing methods used for commercial ice cream. So it tends to become harder with prolonged freezing.
For another homemade frozen dessert, try The Chick-Fil-A Ice Cream Recipe – The Frozen Delight You Can Make at Home.
Frequently Asked Questions
Here are questions we frequently get asked about this chocolate pudding ice cream. Don’t see yours? Ask us in the comments.
What Is Chocolate Pudding Ice Cream?
Chocolate pudding ice cream is a chocolate ice cream with the rich flavor and creamy character associated with chocolate pudding. This recipe does not contain instant pudding mix.
Does This Vegan Chocolate Ice Cream Taste Like Coconut?
You may notice some coconut flavor because coconut milk is the base. In my experience, chocolate remains the dominant flavor, but the balance will vary depending on the coconut milk used and your palate.
Can I Use Natural Cocoa Instead of Dutch-Process Cocoa?
You can, but it will change the result. Natural cocoa is more acidic and generally produces a lighter color and a different chocolate flavor. Dutch-process cocoa is the better choice if you want the recipe as written.
Can I Make This Without an Ice Cream Maker?
Our recipe requires an ice cream maker. This method involves churning the chilled coconut milk base before freezing.
I would not recommend an untested no-churn adaptation as a substitute for this recipe. If you develop and test a no-churn version later, present it as a separate method.
Why Does Homemade Ice Cream Get Hard in the Freezer?
Homemade ice cream can become quite firm after extended freezing. Sugar affects freezing behavior, while freezing speed and storage conditions also influence texture. Let the ice cream soften for a few minutes before scooping.
Related Vegan Desserts
If you’re looking for more dairy-free desserts after making this chocolate pudding ice cream, these recipes offer a few different textures and flavors:
- Vegan Oreo Milkshake (Thick, Creamy & Dairy-Free): A thick, cookie-filled option when you want something cold and creamy without making ice cream.
- Dairy-Free Strawberry and Cream Dessert with Cocoa Pecan Crunch: Fresh strawberries and crunchy cocoa pecans add a lighter contrast to rich chocolate.
- 5 Ingredient Chocolate Chia Seed Pudding Bowl: A simple chocolate pudding option with a thicker, spoonable texture.
- Slow Cooker German Chocolate Bread Pudding: A warm chocolate dessert with a texture that is entirely different from ice cream.
Save a few of these vegan desserts for the next time you want something sweet after dinner.
Ready for a Scoop?
If you’ve got the ingredients, this chocolate pudding ice cream is ready to freeze. Make it, then let me know how the texture and coconut flavor turned out. Have a substitution or troubleshooting tip that worked? Leave a comment and share it with other readers.