Have you ever wanted an easy-to-grab protein snack, but keeping protein bars in your cupboard can get expensive after a while? Baking them can also be tricky, especially if you leave them in the oven for a little too long.
The cool part about this recipe for peanut butter oatmeal protein bars is that you don’t even have to bake them. They also include two sources of protein, one of which you likely won’t even notice the flavor of, because the peanut butter is the point!
Table of Contents

Why This Recipe for No-Bake Peanut Butter Oatmeal Protein Bars?
I’ll admit, there are exactly two things I like about these protein bars. They’re easy to make and easy to grab when I want an easy, healthy snack that’s packed with protein. You don’t even have to bake them.
Okay, I like three things about them because they’re also tasty! They’re easy to store in the refrigerator, too. Their only real “flaw” is that they tend to disappear fast.
If you love quick make-ahead snacks, you may also like these peanut butter oatmeal energy bites or these banana oat breakfast bars for another easy grab-and-go option.
Equipment for No-Bake Peanut Butter Protein Bars
You probably already have most of this equipment somewhere in your kitchen. It’ll make your life easier if you don’t have to go hunting for them in the middle of making these protein bars, though.
- Small Saucepan
- 8″ square baking pan
- Aluminum Foil
- Cooking Spray
- Food Processor
- Large Mixing Bowl
- Sturdy Mixing Spoon
- Spatula
- Sharp Knife
Why a sharp knife? It sounds counterintuitive, but keeping your kitchen knives sharp actually makes them safer to use for applications like these protein bars! You basically have two options here. You could take them to a professional knife sharpener or get an inexpensive knife-sharpening tool to keep them as sharp as the day you bought them.
Ingredients for No-Bake Peanut Butter Protein Bars
Let’s make sure we have all the ingredients for these protein bars before we start, because I never did like having to run to the grocery store for an ingredient in the middle of making something!
Quick List
- Lightly Salted or Unsalted Roasted Peanuts
- Old-Fashioned Rolled Oats
- Dried Dates
- Agave Nectar
- Unsweetened Applesauce
- Powdered Peanut Butter
- Pea Protein Powder
- Vanilla Extract
- Ground Cinnamon
Ingredient Notes and Smart Swaps
Curious about any of these ingredients? Here’s what each of these ingredients adds to the recipe!
Lightly Salted or Unsalted Roasted Peanuts
1/2 cup roasted peanuts
I used lightly salted peanuts for this recipe, but I think it would be okay to use unsalted ones if you’re watching your salt intake. They add a nice extra peanut-flavored crunch to these bars.
Accidentally bought unroasted peanuts? No need to panic! The video below shows how to roast peanuts at home. (Plus, we can toast them in the oven for a bit before adding them to the protein bars anyway!)
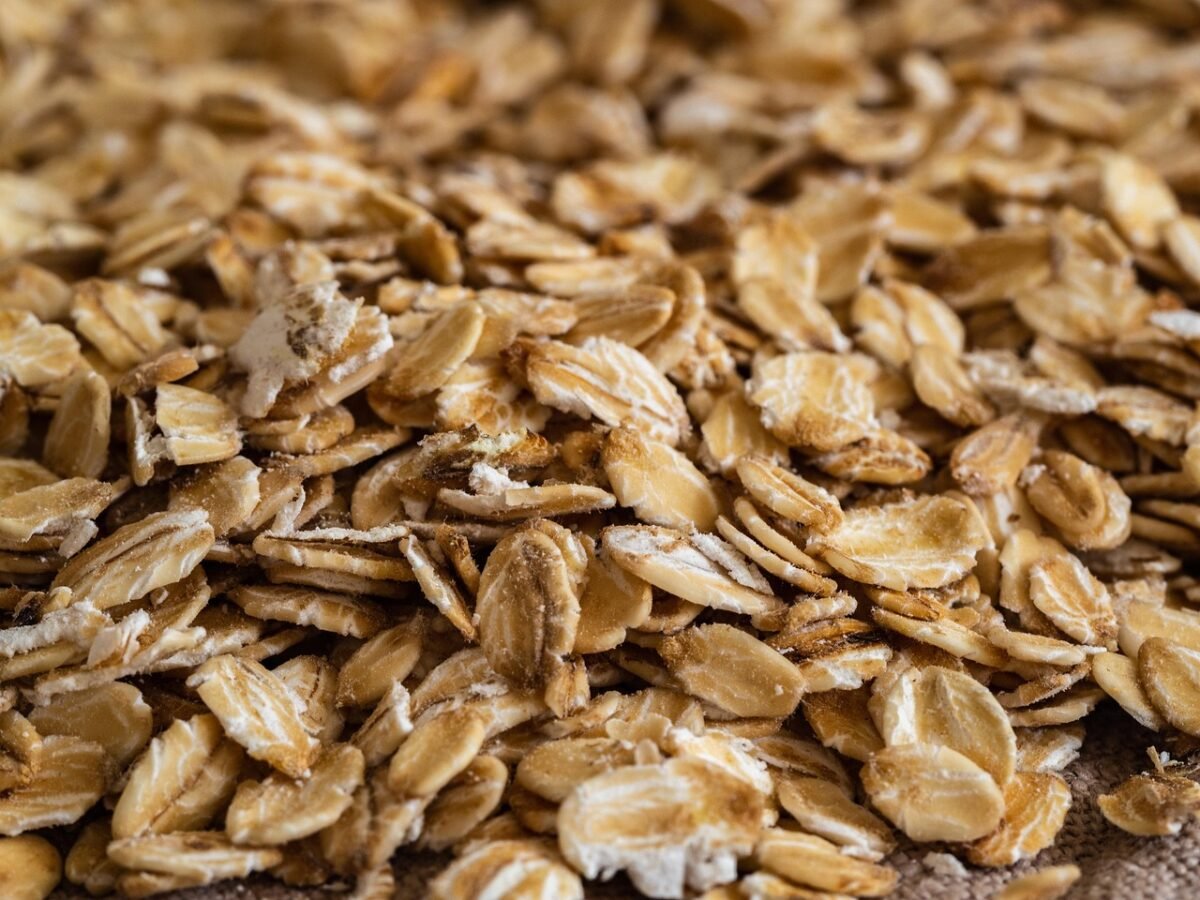
Old-Fashioned Rolled Oats
1 1/2 Cups Old-Fashioned Rolled Oats
I like to use old-fashioned rolled oats because they have a flat, flaky texture that’s uniquely suited for protein bars. They’re somewhere between instant oats and steel-cut oats in cooking time.
Tip: Oats are naturally gluten-free, but if you want to make sure they didn’t get cross-contaminated with gluten-containing products at the processing facility, look for a “Certified Gluten-Free” label on the packaging.
Rolled oats are one of my favorite ingredients for homemade snacks because they add chewiness and help make bars more filling. They also work beautifully in recipes like vanilla overnight oats, homemade protein granola, and healthy banana oat seed bars.
Dried Dates
1 cup dried dates, pitted
Dates have a unique flavor among fruits, often described as caramel with a hint of honey, nutmeg, or root beer. I like to use them for protein bars because they add a unique flavor and texture. If you’d rather not do the work of removing the pits, you can get dates with pits already removed.
What to remember about dates: They have a high glycemic index and are high in fiber, so make sure you don’t eat too many of them if you are concerned about spikes in blood sugar levels or possible digestive issues. (Yes, it would likely be wise to get the one-pound bag of dates instead of the five-pound bag if you see them being sold in multiple package sizes.)
Agave Nectar
1/4 cup agave nectar
Agave nectar is actually a pretty strong sweetener, so you don’t need much. Most of the sugar in agave nectar is fructose, which tends to have a stronger sweet flavor than granulated sugar. So if you ever need to use agave as a sugar substitute, you can reduce the sweetener by 1/3 of the sugar amount the recipe calls for.
Unsweetened Applesauce
1/4 cup plus 2 tablespoons unsweetened applesauce
Applesauce adds its own natural sweetness, so it doesn’t need any additional sweetener. It also adds some of the moisture that makes these protein bars nice and chewy.
Peanut Butter Powder
1/4 cup plus 2 tablespoons peanut butter powder
I used the Naked PB brand peanut butter powder for this recipe, but any peanut butter powder with only peanuts in its ingredient list should work. This adds the peanut butter flavor without making the protein bars too oily or adding ingredients other than peanuts, unlike the more familiar peanut butter spreads typically used for sandwiches.
Pea Protein Powder
1/4 cup plus 2 tablespoons pea protein powder
Like the peanut butter powder, I used the Naked Pea protein powder, but any powder that lists only pea protein as an ingredient should work. Pea protein powder has a surprisingly neutral flavor, so it’ll add more protein without adding much pea flavor to the protein bars.
Vanilla Extract
1 teaspoon vanilla extract
Vanilla extract adds a creamy flavor that complements the sweetness in these protein bars. I like to look for genuine vanilla extract that lists vanilla beans, water, and alcohol as ingredients because it adds a more robust flavor than imitation vanilla extract.
Ground Cinnamon
1 teaspoon ground cinnamon
Cinnamon has a mild, sweet-spicy flavor that makes it a popular addition to mildly sweet snacks and desserts. If you have to choose between types of cinnamon, go with Ceylon cinnamon, which has a delicate, slightly sweet flavor and a woody, citrus aroma that pairs well with the fruit flavors of applesauce and dates in these protein bars.

Printable Peanut Butter Oatmeal Protein Bars Recipe Card
Ingredients
- 1/2 cup lightly salted roasted peanuts , crushed
- 1 1/2 cups old fashioned rolled oats , gluten free if needed
- 1 cup dried dates , pitted
- 1/4 cup agave nectar
- 1/4 cup + 2 tablespoons unsweetened applesauce
- 1/4 cup + 2 tablespoons peanut butter powder
- 1/4 cup + 2 tablespoons cup pea protein powder
- 1 teaspoon vanilla extract
- 1 teaspoon cinnamon
Instructions
- Optional first step: Preheat your oven to 350 degrees Fahrenheit (176 degrees Celsius). Line an 8″ square baking pan with aluminum foil and spray lightly with cooking spray. Spread the oats and chopped peanuts in an even layer on the baking pan. Toast them in the oven for 10 minutes. This gives the peanuts and oats extra flavor.
- Add oats and chopped peanuts to a large mixing bowl.
- Process dates in a food processor until they become a ball.
- Add the date ball and cinnamon to the large mixing bowl with the oats and peanuts. Mix with a sturdy spoon until well-combined.
- Whisk together the vanilla, agave, applesauce, peanut butter powder, and pea protein powder in a small saucepan until smoothly combined. Heat through over low heat. Do not boil.
- Add the applesauce mixture to the mixing bowl and mix together until all ingredients are evenly incorporated. Don’t forget to reach to the bottom of the bowl to make sure none of the oats or peanuts settle out of the mixture while you’re mixing. This may take a few minutes.
- Transfer the mixture to the pan and press it down with a spatula until it forms a flat, even layer about 1/4 inch thick. (It’s okay to estimate here – there have been a few times when I got it a bit thicker. But they should be about as thick as those protein or granola bars you might have gotten in the grocery store before you decided to make your own.)
- Put the pan with the protein bars in the refrigerator and let it chill for at least 2 hours.
- Cut the mix into eight evenly sized protein bars. It’s okay to hand one to your kids if they ask for one!
- I like to try one after I cut them just to make sure they turned out okay. (They usually do.) They can also be stored in an airtight container in the refrigerator for up to a week. They can also survive being taken along in lunch boxes if you put them in a resealable plastic bag.
Nutrition
How to Make Peanut Butter Oatmeal Protein Bars
Let’s get started with making these peanut butter oatmeal protein bars! I like to make them the night before I want them because they will have to be in the refrigerator for at least a couple of hours after I make them. Then I just grab a protein bar first thing in the morning.
Step One: Preheat Oven
Preheat your oven to 350 degrees Fahrenheit (176 degrees Celsius).
Step Two: Prepare Baking Pan
Line an 8″ square baking pan with aluminum foil and spray lightly with cooking spray.
Step Three: Toast Oats and Peanuts
Spread the oats and chopped peanuts in an even layer on the baking pan. Toast them in the oven for 10 minutes.
(Toasting the oats and peanuts gives them extra flavor, but you can skip this step if you’d like these protein bars to be fully “no-bake.)
Step Four: Add Oats and Peanuts to Mixing Bowl
Transfer oats and peanuts to a large mixing bowl. Set aside to cool while you get the dates ready.
Step Five: Run Dates Through Food Processor
Process dates in a food processor until they become a ball.
Step Six: Add Dates and Cinnamon to Mixing Bowl
Add the date ball and cinnamon to the large mixing bowl with the oats and peanuts. Mix with a sturdy spoon until well-combined.
Step Seven: Combine Remaining Ingredients in Saucepan
Whisk together the vanilla, agave, applesauce, peanut butter powder, and pea protein powder in a small saucepan until smoothly combined. Heat through over low heat. Do not boil.
Step Eight: Add Mix in Saucepan to Mixing Bowl
Add the applesauce mixture to the mixing bowl and mix together until all ingredients are evenly incorporated. Don’t forget to reach to the bottom of the bowl to make sure none of the oats or peanuts settle out of the mixture while you’re mixing. This may take a few minutes.
Step Nine: Transfer Mix to Pan and Form Protein Bars
Transfer the mixture to the pan and press it down with a spatula until it forms a flat, even layer about 1/4 inch thick. (It’s okay to estimate here – there have been a few times when I got it a bit thicker. But they should be about as thick as those protein or granola bars you might have gotten in the grocery store before you decided to make your own.)
Best Texture Tips for Peanut Butter Oatmeal Protein Bars
- For bars that slice cleanly and hold their shape, make sure to press the mixture firmly into the pan before chilling. A spatula works well, but the flat bottom of a measuring cup can help pack everything down evenly.
- If your dates feel dry or tough, soak them in warm water for 5–10 minutes, then drain them well before running them through the food processor. Softer dates help bind the oats, peanuts, and protein powder together.
- If the mixture feels too wet or sticky, add 1–2 tablespoons of oats until it is easier to press into the pan. If it feels too dry or crumbly, add a small spoonful of applesauce or agave until the mixture starts to hold together.
Step Ten: Refrigerate Protein Bars
Put the pan with the protein bars in the refrigerator and let it chill for at least 2 hours.
Step Eleven: Cut Protein Bars
Cut the mix into eight evenly sized protein bars. It’s okay to hand one to your kids if they ask for one!

Step Twelve: Eat or Store Protein Bars
I like to try one after I cut them just to make sure they turned out okay. (They usually do.) They can also be stored in an airtight container in the refrigerator for up to a week. They can also survive being taken along in lunch boxes if you put them in a resealable plastic bag.
To freeze, wrap each bar individually and store in a freezer-safe bag or container for up to 2 months. Thaw overnight in the refrigerator or at room temperature for 15–20 minutes before eating.
Substitutes for Peanut Butter Oatmeal Protein Bars
Almost any nut butter powder should work in these protein bars if you’d rather not use peanut butter powder. The only substitute powder I’ve tried so far is almond butter powder, and the protein bars turned out pretty well. They just tasted like almond butter instead of peanut butter.
Chopped cashews can work as a substitute for the peanuts.
Honey can replace the agave nectar at a 1:1 ratio. I’d just expect working with the honey to be a little stickier, and honey might give the bars a slightly more floral or fruit flavor than agave nectar does.
Mashed bananas might work as a substitute for the applesauce. Just make sure you use overripe, but not moldy, bananas and mash them up really well with a fork.

For another peanut butter snack with a slightly different texture, try these no-bake peanut butter granola bars. They are also easy to make ahead and keep in the fridge for quick snacks.
FAQ About Peanut Butter Granola Protein Bars
Although I think these protein bars are easy to make, we do get questions sometimes! I did my best to answer some of the most common questions here. If you think of one we haven’t answered yet, feel free to ask in our comments section!
Why don’t we have to bake the protein bars?
These bars are a lot like “no-bake cookies.” They contain ingredients that don’t really need to be baked to set up nicely in the refrigerator.
The secret’s actually the oats! Besides giving these protein bars a nice texture, oats are quite good at absorbing moisture, which helps the bars firm up nicely and avoid turning out too liquidy. That’s actually one reason these bars need a chill time instead of being baked. Popping them in the refrigerator for a couple of hours gives the oats time to absorb moisture from other ingredients like the applesauce.
Why are my protein bars falling apart?
The most common reasons are not pressing the mixture firmly enough into the pan, using dates that are too dry, or not chilling the bars long enough. Remember, the bars should be pressed down to an even thickness of 1/4″.
Can I make these protein bars without pea protein powder?
You can, but the texture may turn out differently. If you’d rather not use the pea protein powder, you could try leaving it out and adding a little more peanut butter powder.
Can I make these bars nut-free?
It’s doable, but you’ll need to replace both the peanuts and the peanut butter powder. Try sunflower seed butter and sunflower seed protein or extra oats for a nut-free version, though the flavor and texture will change.
Are these bars gluten-free?
They can be! The important thing with gluten-free recipes is to eliminate the possibility of cross-contamination with gluten-containing grains like wheat and rye. To be sure, you should especially look for oats that have a “certified gluten-free” label on the packaging.
Why did my bars disappear from the fridge?!
The most likely explanation is that somebody ate them before you got to them! (Not too surprising if so. They are tasty! I could also see this happening if you’re at all prone to sleepwalking and stuff has disappeared out of the fridge before!)
More Tasty No-Bake Snacks and Desserts
Looking for more easy treats that don’t require much oven time? These no-bake snacks and desserts are simple, satisfying, and perfect for when you want something sweet without a lot of extra work.
- Flourless Dark Chocolate No-Bake Cookies
- No-Bake Peanut Butter Squares
- No-Bake Keto Coconut Mousse
- Frozen Peanut Butter Banana Chocolate Cups
- No-Bake Strawberry Pie
Whether you’re craving something chocolatey, fruity, creamy, or freezer-friendly, these easy no-bake treats are perfect for keeping dessert simple.
Did You Make These Protein Bars?
Did you like these no-bake peanut butter oatmeal protein bars? If so, be sure to let us know what you think in the comments. And don’t forget to rate this recipe!