Love jalapeño poppers but don’t want to spend your time stuffing, wrapping, and baking individual peppers? This Jalapeño Popper Cheese Ball gives you all the creamy, cheesy, spicy flavor you love in a much easier party appetizer.
This cheese ball combines softened cream cheese, cheddar, jalapeños, bacon, sour cream, and savory seasonings for a rich, flavorful center. Then it’s finished with a crunchy panko, bacon, and parsley coating that gives every bite a little contrast. Best of all, there’s no oven required.
Table of Contents

It’s also an excellent make-ahead appetizer. You can prepare the cheese mixture ahead of time, chill it until firm, and add the crunchy coating closer to serving. That makes it especially convenient for holidays, game days, potlucks, family gatherings, or anytime you’re expecting a crowd.
Before you start, keep reading for tips and tricks to make this your new favorite party appetizer. Then all that’s left to do is mix, chill, coat, and enjoy!
Why You’ll Love This Jalapeño Popper Cheese Ball
If you love the creamy, cheesy filling of jalapeño poppers, you’re going to love this easy cheese ball. It has all those familiar flavors in a party-friendly appetizer that requires no stuffing, baking, or frying. Just mix the ingredients together, shape the mixture into a ball, chill it until firm, and add the crunchy topping before serving.
There are plenty of reasons this is such a great appetizer to keep in your recipe collection:
- No oven required: Everything comes together without baking or cooking the finished cheese ball.
- Easy to make ahead: Prepare it ahead of time and keep it refrigerated until you’re ready to serve.
- Easy to customize: Adjust the amount of jalapeño depending on how spicy you like your appetizers.
- Great for parties: It’s easy to put on a serving board with crackers, pretzels, and fresh vegetables.
- Feeds a crowd: One cheese ball makes plenty for a holiday gathering, game day, potluck, or family get-together.
I especially love that most of the work can be done well before your guests arrive. Make the cheese mixture ahead, chill it until firm, and save the final coating for closer to serving time. That way, you’re not trying to prepare an appetizer while everyone else is enjoying the party.
What Does This Appetizer Taste Like?
This Jalapeño Popper Cheese Ball tastes like your favorite jalapeño popper transformed into a creamy, scoopable appetizer. The base is rich and tangy from the cream cheese and sour cream, while cheddar gives it a stronger cheese flavor. Then you get smoky bacon and jalapeños in every bite.
Want our human-written content to rank above AI-generated garbage? Help us out by clicking this button!
The jalapeños provide more than just heat. If you’re using canned or pickled jalapeños, they’ll add a little acidity that helps cut through the richness of the cheese. Fresh jalapeños have a brighter, more noticeable pepper flavor and can give the cheese ball a stronger kick.
Worcestershire sauce and garlic powder add savory depth without taking over the flavor. The panko coating brings some much-needed texture to the appetizer, creating a nice contrast between the creamy center and crisp exterior. Serve it with sturdy crackers, pretzels, tortilla chips, or fresh vegetables so everyone can scoop up plenty of the creamy filling.
If you love everything jalapeño related, you have to try these jalapeño and bacon deviled eggs or these candied jalapeños.
Ingredients You’ll Need
You only need a handful of familiar ingredients to make this Jalapeño Popper Cheese Ball. And it’s the delicious combination that gives the finished cheese ball that classic jalapeño popper flavor while keeping the texture creamy and easy to spread. Here’s what you’ll need:
- Cream Cheese
- Cheddar Cheese
- Sour Cream
- Jalapeños
- Bacon
- Worcestershire Sauce
- Garlic Powder
- Panko Breadcrumbs
- Fresh Parsley
Have your cream cheese softened and your jalapeños and bacon prepared before you start mixing. Once everything is ready, the cheese mixture comes together quickly.
Measurements for each ingredient, along with instructions for making Jalapeño Popper Cheese Ball, are in the printable recipe card below.
How Spicy Is This Cheese Ball?
The great thing about this cheese ball is that you can easily control the heat. Jalapeños can vary quite a bit from pepper to pepper, and your choice of fresh versus canned jalapeños can also change the overall flavor and spice level.
For a milder cheese ball, use canned or pickled jalapeños and remove the seeds before chopping. You can also reduce the amount of jalapeño slightly. The cream cheese, cheddar, and sour cream naturally mellow the pepper’s heat, so you’ll still get plenty of flavor.
For a medium level of heat, follow the recipe as written. You’ll get recognizable jalapeño flavor without making the cheese ball overwhelmingly spicy, making this a good choice when you’re serving a crowd.
If you prefer a spicier appetizer, use fresh jalapeños or increase the amount of pepper. You can leave some of the seeds and membranes intact for additional heat, although keep in mind that fresh jalapeños vary naturally in spiciness.
Tip: Also remember that the cheese ball is served chilled, which can slightly mute the perception of heat and seasoning. It’s a good idea to taste the mixture before shaping it and make any adjustments at that point.

Printable Jalapeño Popper Cheese Ball Recipe Card
Ingredients
Cheese Ball:
- 8 oz Cream Cheese, softened
- 2 tsp Worcestershire Sauce
- 2 tbsp Sour Cream
- ½ tsp Garlic Powder
- 1 cup Cheddar Cheese, shredded
- ¼ cup Bacon, cooked, cooled, and chopped
- ⅓ cup Canned Jalapeños, diced
Topping:
- ½ cup Panko Bread Crumbs
- 2 tbsp Fresh Parsley, chopped
- 3 tbsp Bacon, cooked, cooled, and chopped
Instructions
To Make the Cheese Ball:
- In a large bowl, mix all dip ingredients together well.
- Place the mixture in the center of a piece of plastic wrap. Wrap the plastic wrap around the cream cheese mixture and form it into a ball. Refrigerate for at least an hour until it is firm.
Topping:
- In a large bowl, mix the topping ingredients.
Assembly:
- Roll the chilled cheese ball in the toppings, pressing gently so it sticks to the ball without squishing it out of shape, until it is completely coated.
- Place on a serving tray surrounded by your favorite dippers: crackers, vegetables, toasted baguette slices, etc.
Fresh vs Canned Jalapeños: Which is Better?
Both fresh and canned jalapeños work well in this Jalapeño Popper Cheese Ball, but they give you slightly different results. The best choice really depends on the flavor you’re looking for and how much prep time you have.
Canned/Pickled Jalapeños
Canned or pickled jalapeños are my go-to when I’m making this for a party. They’re convenient, easy to chop, and their slightly tangy flavor works really well with the rich cream cheese and bacon. Because they’re already prepared, you don’t have to wash, seed, or chop fresh peppers, which makes this a particularly easy appetizer to throw together.
Canned jalapeños also tend to have a softer texture, so they blend easily into the cheese mixture. Their heat can be more predictable than fresh peppers, although brands can still vary. If you’re serving guests who don’t all enjoy spicy food, canned jalapeños are an easy way to get that classic jalapeño popper flavor without making the cheese ball overwhelmingly hot.
Fresh Jalapeños
Fresh jalapeños give you a brighter, more noticeable pepper flavor. They have a little more crunch and can taste fresher and more vibrant in the finished cheese ball. They’re a great choice if you really want the jalapeño flavor to stand out.
The biggest thing to remember with fresh peppers is that their heat can vary. One jalapeño might be relatively mild while another can have quite a bit more kick. If you’re using fresh jalapeños, taste a small piece before adding them so you have a better idea of what you’re working with.
You can also use a combination of the two if you want the best of both worlds. Canned jalapeños provide tanginess and convenience, while a small amount of fresh jalapeño adds a brighter pepper flavor. Or try these candied jalapeños for a fun, sweet-and-spicy touch to this recipe.
Step-by-Step: How to Make a Jalapeño Popper Cheese Ball
Making a cheese ball is much easier than it looks. Once your ingredients are prepared, most of the work involves mixing everything together and giving the cheese mixture enough time to chill and firm up.
1. Soften the Cream Cheese
Start with softened cream cheese. Let it sit at room temperature until it’s easy to stir or mix. This is important because cold cream cheese can be difficult to combine with the sour cream, cheddar, jalapeños, and seasonings.
If you’re short on time, cut the cream cheese into smaller cubes so it softens more quickly.
2. Mix the Cheese Ball Filling
Add the softened cream cheese, sour cream, cheddar cheese, Worcestershire sauce, garlic powder, jalapeños, and bacon to a mixing bowl. Mix until everything is evenly combined. You want the jalapeños and bacon distributed throughout the cheese rather than concentrated in a few spots.
Before shaping the cheese ball, give the mixture a taste. This is your opportunity to adjust the seasoning or add more jalapeño if you want additional heat.

3. Shape & Chill the Cheese Ball
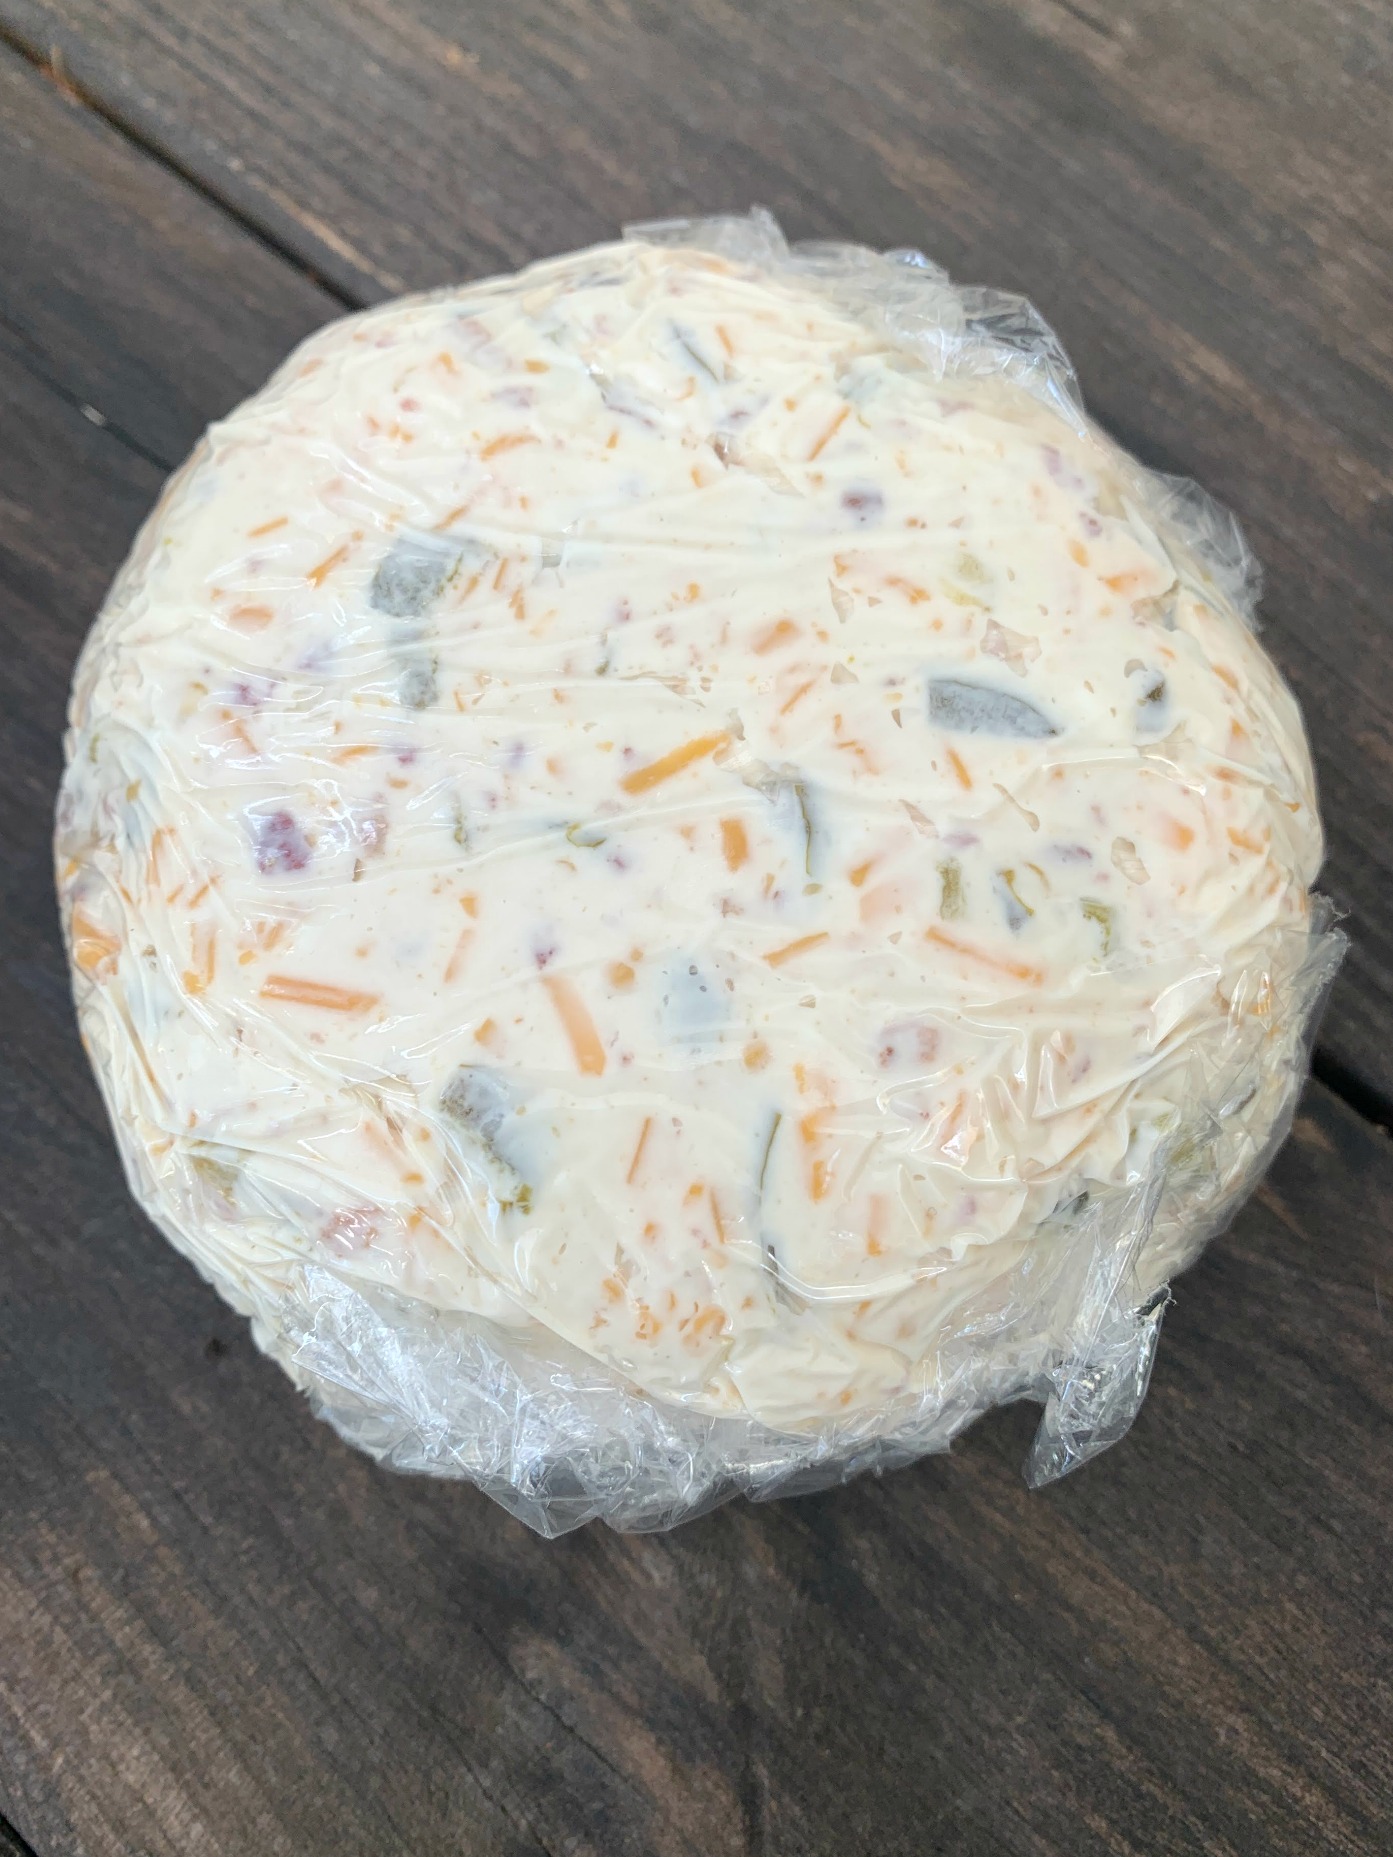
Once the mixture is thoroughly combined, transfer it onto a sheet of plastic wrap. Use the plastic wrap to help gather the mixture together and shape it into a ball. Don’t worry if it isn’t perfectly round at first. The chilling process will make the mixture easier to handle, and you can reshape it slightly before adding the coating.
Next, wrap the cheese ball tightly and refrigerate it until firm. This gives the cheese mixture time to set and makes it much easier to coat and serve. For the best texture, don’t rush this step. A properly chilled cheese ball should hold its shape when you unwrap it rather than spreading or flattening immediately.
4. Prepare the Topping
While the cheese ball chills, prepare the panko, bacon, and parsley topping. The crunchy coating is an important part of the appetizer because it provides a contrast to the soft, creamy center. Make sure everything is evenly combined so you get a little of each ingredient with every bite.

5. Coat the Cheese Ball
Once the cheese ball is firm, carefully unwrap it and roll it in the topping mixture. Gently press the coating against the surface so it sticks, but don’t press too hard or you’ll flatten the cheese ball. Try to cover the entire outside with an even layer of topping.
6. Serve
Transfer the finished cheese ball to a serving platter and surround it with your favorite crackers, pretzels, tortilla chips, or fresh vegetables. If you’re not serving it immediately, keep it refrigerated until you’re ready to put it out. For the best texture, avoid leaving the cheese ball sitting at room temperature for longer than necessary.

Make-Ahead Instructions
One of the best things about this Jalapeño Popper Cheese Ball is that you don’t have to make it right before your guests arrive. In fact, preparing it ahead of time can make the entire process easier because the cheese mixture has more time to firm up in the refrigerator.
You can prepare the cheese ball up to 5 days in advance, making it perfect if you’re preparing for the holidays or a large party!. The important thing is to keep it tightly wrapped and refrigerated and to save the crunchy topping until close to serving whenever possible.
Make It Up To 5 Days Ahead
Making the cheese ball the day before is probably the easiest option if you’re preparing it for a party. And it’s actually a great time to make the cheese ball because the extra chilling time allows it to firm up completely and makes it easier to coat.
Prepare the cheese mixture according to the recipe, shape it into a ball, and wrap it tightly in plastic wrap. Place it in the refrigerator overnight.
What to Do Before Serving
When you’re ready to serve, remove the cheese ball from the refrigerator and unwrap it. If necessary, gently reshape it with your hands so it looks neat and rounded.
Then roll it in the prepared topping, gently pressing the mixture onto the outside so it sticks.
Arrange the finished cheese ball on a serving platter with plenty of dippers around it. Crackers and pretzels are sturdy enough to scoop up the creamy cheese, while vegetables such as celery, carrots, bell peppers, and cucumber provide a lighter option.
Can I Freeze It?
You can freeze this cheese ball, which makes it an especially convenient appetizer to prepare well in advance, just like this freezer buffalo chicken dip.
If you’re freezing it, prepare and shape the cheese mixture but keep the crunchy coating separate. Wrap the cheese ball tightly in plastic wrap, making sure there are no exposed areas, and then place it in a freezer-safe container or bag for additional protection against freezer burn.
When you’re ready to use it, thaw the cheese ball in the refrigerator rather than leaving it on the counter. Once completely thawed, check the texture and reshape it gently if needed. Add the panko, bacon, and parsley coating after thawing rather than before freezing. This helps preserve the texture of the crunchy topping and prevents it from becoming soft during storage and thawing.
What to Serve With This Cheese Ball
A creamy, flavorful cheese ball is best served with plenty of crunchy dippers. Since this Jalapeño Popper Cheese Ball is rich and cheesy, I like to offer a mix of salty crackers, crunchy vegetables, and a few heartier options so everyone has something they enjoy.
Some of my favorite dippers include:
- Crackers: Buttery crackers, wheat crackers, or sturdy multigrain crackers all work well.
- Pretzels: The salty crunch of pretzels pairs especially well with the creamy cheese and bacon.
- Tortilla chips: Great for a casual party or game-day spread.
- Fresh vegetables: Try celery, carrots, bell peppers, cucumber, or snap peas for a lighter option.
- Toasted baguette: Slices of crusty bread make a heartier dipper and work beautifully on an appetizer board.
For a party, arrange the cheese ball in the center of a large platter or wooden board and place the crackers, vegetables, and other dippers around it. I love this ceramic serving platter that is perfect for holding the cheese ball, with plenty of space for crackers and other dippers while still looking elegant. Adding a few colorful vegetables also makes the creamy cheese ball look more inviting and gives guests plenty of options.

Jalapeño Popper Cheese Ball Troubleshooting
All your questions are answered here! For any other troubleshooting tips, reach out to us in the comments section.
Why Is My Cheese Ball Too Soft?
The cream cheese may not have been chilled long enough, or the mixture may contain too much moisture from the sour cream or jalapeños. Refrigerate the cheese ball longer before shaping or serving, and make sure excess liquid is drained from the jalapeños.
Why Won’t My Cheese Ball Hold Its Shape?
A cheese ball needs plenty of time in the refrigerator to firm up before you try to coat it. Wrap it tightly and chill it for several hours, then reshape it gently with your hands if needed before adding the topping.
Why Is My Panko Topping Soggy?
The panko can absorb moisture from the cheese mixture if it’s added too far in advance. For the crispiest topping, store the coating separately and add it shortly before serving.
How Can I Make It Less Spicy?
Use canned or pickled jalapeños and remove the seeds and membranes before chopping. You can also reduce the amount of jalapeño slightly and add more cream cheese or cheddar to mellow the heat.
How Can I Make It More Flavorful?
Make sure the cream cheese mixture is well seasoned before shaping the cheese ball, and taste it so you can adjust the jalapeño, garlic powder, or Worcestershire sauce. Using sharp cheddar and freshly cooked bacon can also add more flavor to the finished appetizer.
Closing Out
This Jalapeño Popper Cheese Ball is one of those appetizers that looks impressive on a party table but is surprisingly simple to make. You get the familiar flavors of jalapeño poppers—creamy cheese, spicy peppers, smoky bacon, and plenty of savory flavor—without having to prepare individual poppers.
For the best results, give the cheese ball plenty of time to chill and firm up before serving. If you’re making it ahead, wait to add the panko coating until closer to serving so you can keep that delicious crunch. And don’t be afraid to adjust the jalapeños to your preferred level of heat.
Whether you’re putting together a holiday appetizer spread, hosting game day, bringing something to a potluck, or simply looking for an easy snack to share, this cheese ball is a great make-ahead option.
Serve it surrounded by your favorite crackers and fresh vegetables, and let everyone dig in. If you make it, leave a rating and let me know in the comments: did you keep it mild, or did you turn up the jalapeño heat?
More Tasty Appetizers
Do you have a favorite appetizer that you love to snack on or are you looking to try something new? We have a delicious collection of snack recipes for you to try starting with the recipes below!
Connect With Us
We love to hear from our readers. Leave us your thoughts on this recipe. Did you change up the level of heat? Add in some new ingredients? How did you serve it up? Let us know in the comments!