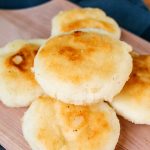
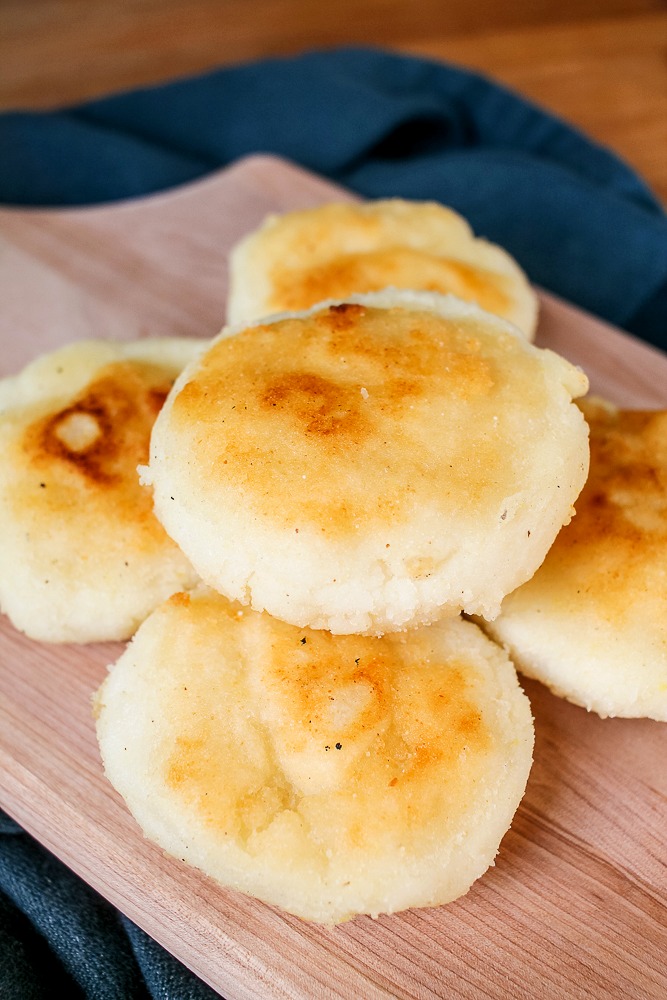
If you’ve never had an arepa before, you’re in for something special. These golden corn cakes are a staple in Venezuelan kitchens. They’re enjoyed for breakfast, lunch, dinner, and sometimes all three in the same day. They’re baked in a hot pan to create the perfect balance of crispy exterior and a warm and fluffy interior.
If you’re intimidated by making bread at home, this is your low-pressure, high-reward starting point. It only takes three simple ingredients to make these from scratch, and the dough comes together in minutes. You shape them by hand, cook them until they’re golden, and fill your kitchen with the incredible smells of warm, homemade food.
Table of Contents
A couple of years ago, I bought a bag of cornmeal for my favorite Blueberry Upside Down Bread and had quite a bit leftover. The back of the bag had a recipe for arepas that were only made with cornmeal, water, and salt! It looked simple enough, and wasn’t going to cost me much time or money if they came out badly, so I figured, why not? But, we loved them!
They were the perfect complement to grilled pork, plus so many other sandwich fillings! There were many, many requests for me to not only make them again but make them frequently! Later on in this article, I’ll get into all the classic filling combinations that make these Venezuelan staples so well known around the world.
These are perfect for an easy weeknight dinner, a unique brunch idea, or a way to explore Venezuelan cuisine from your own kitchen. It’s simple enough for beginners but satisfying enough to impress anyone at the table. So grab a bowl, heat up your skillet, and let’s make some arepas!
What Are Arepas?
Arepas are basically flat, round, corn cakes that get baked, fried, or grilled to a golden, crispy perfection. They date back thousands of years in South America and are most notably a part of Colombian, Bolivian, and Venezuelan cuisine, but each country has its own slight variations on this dish. They have greatly evolved since those early pre-Columbus days from a simple, indigenous bread to a versatile, stuffed dish.
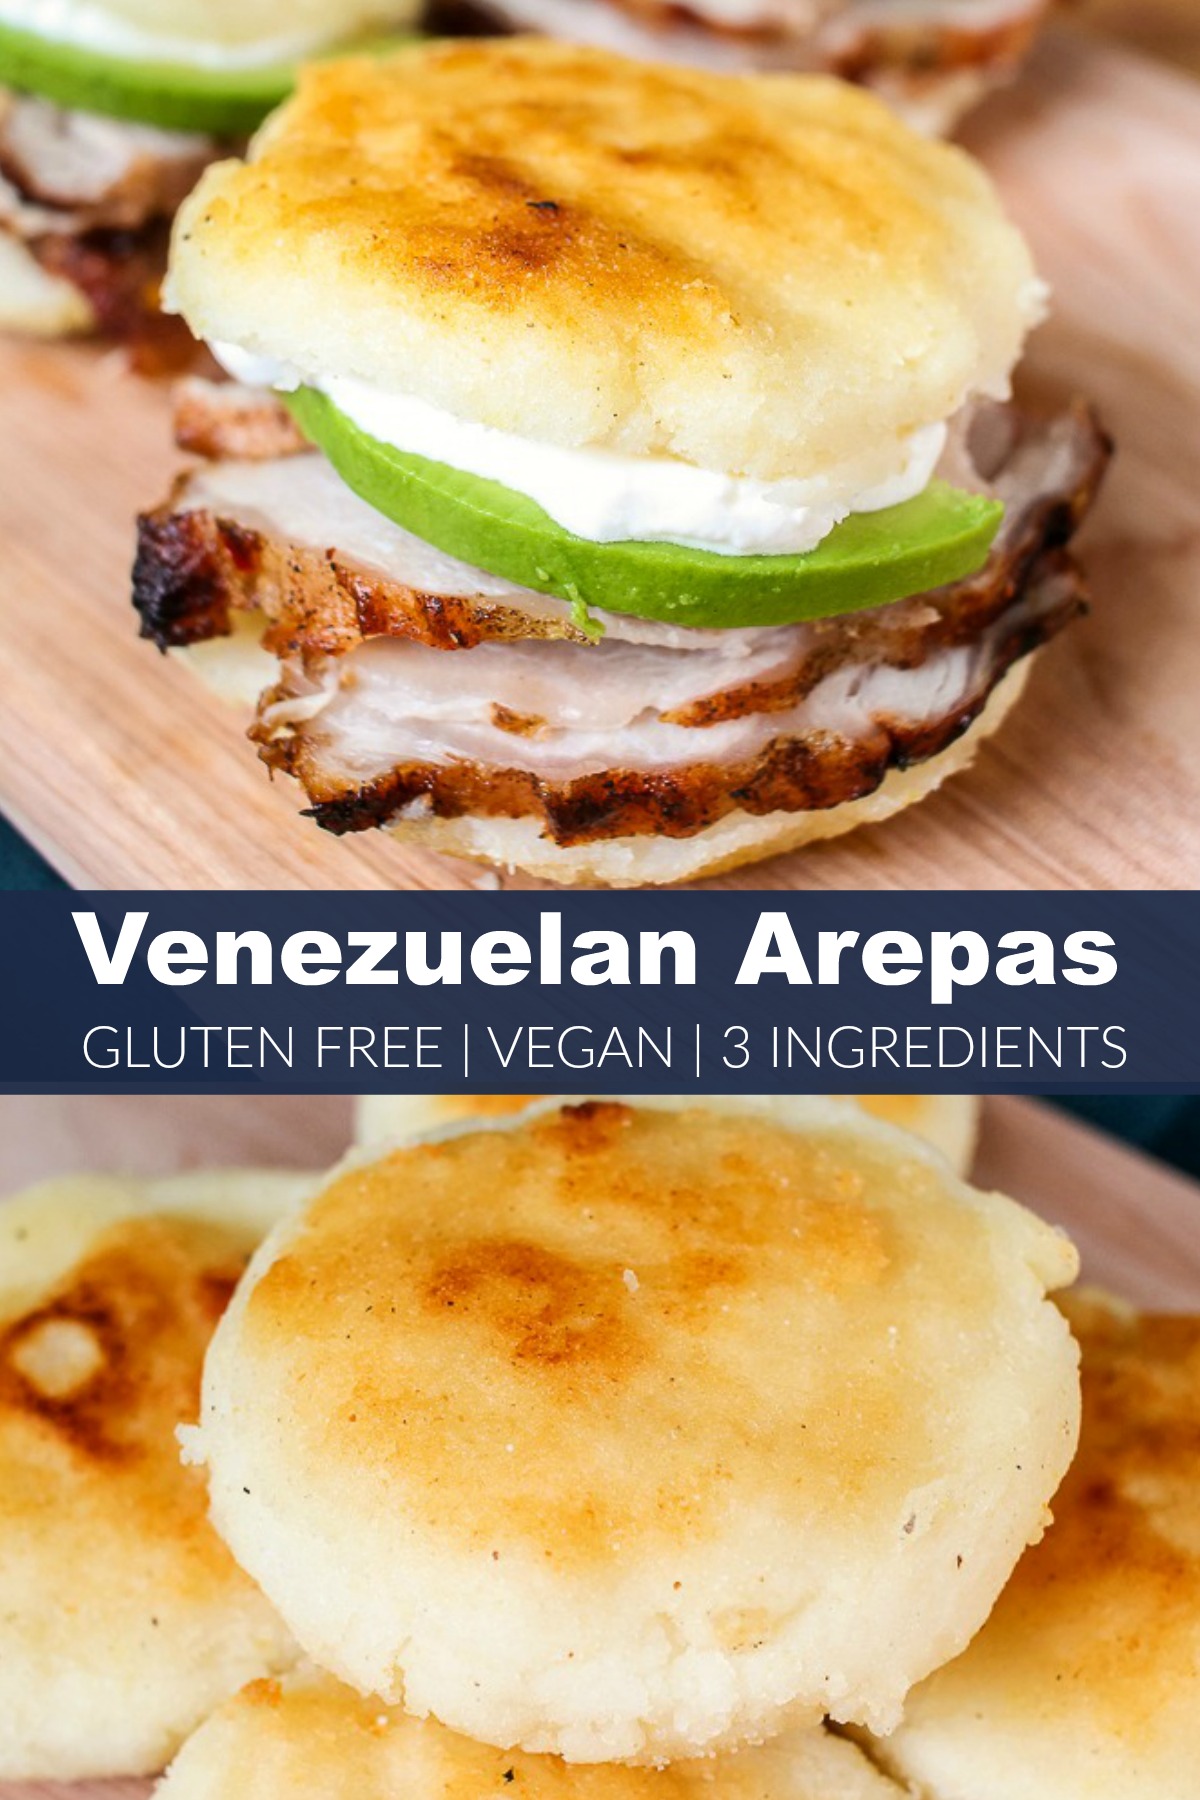
In Venezuela, arepas are a symbol of their gastronomy. They even have restaurants called areperas that specialize in arepas. They are shaped and cooked in a way that is thicker than Colombian arepas, which are much thinner and flatter. That’s because Venezuelan arepas are meant to be split open and stuffed with many delicious fillings.
Why You’ll Love These Arepas
Stumbling across a recipe on the back of a cornmeal box is one of the best happy incidents that has happened in my food life. I love making these arepas on a random weeknight to surprise the family or for something fun and different for a girls’ night. Here are a few more reasons why you’ll love them too!
- You only need 3 ingredients!
- It is a simple and foolproof recipe.
- No right or wrong: get creative and fill them with whatever ingredients you’d like.
- Enjoy them anytime: breakfast, lunch, dinner, or a snack!
Printable Venezuelan Arepas Recipe Card
Ingredients
- 2 cups precooked cornmeal (like P.A.N.)
- 1 tsp salt
- 2 cups water, warm
Instructions
- In a medium-sized bowl, add the warm water. Slowly add the salt and cornmeal. Stir with a wooden spoon or your hand until a soft dough forms. It should come cleanly away from the sides of the bowl and your fingers. Add more water or cornmeal as needed if the dough is too dry or too sticky.
- Let dough sit in bowl for 5 minutes.
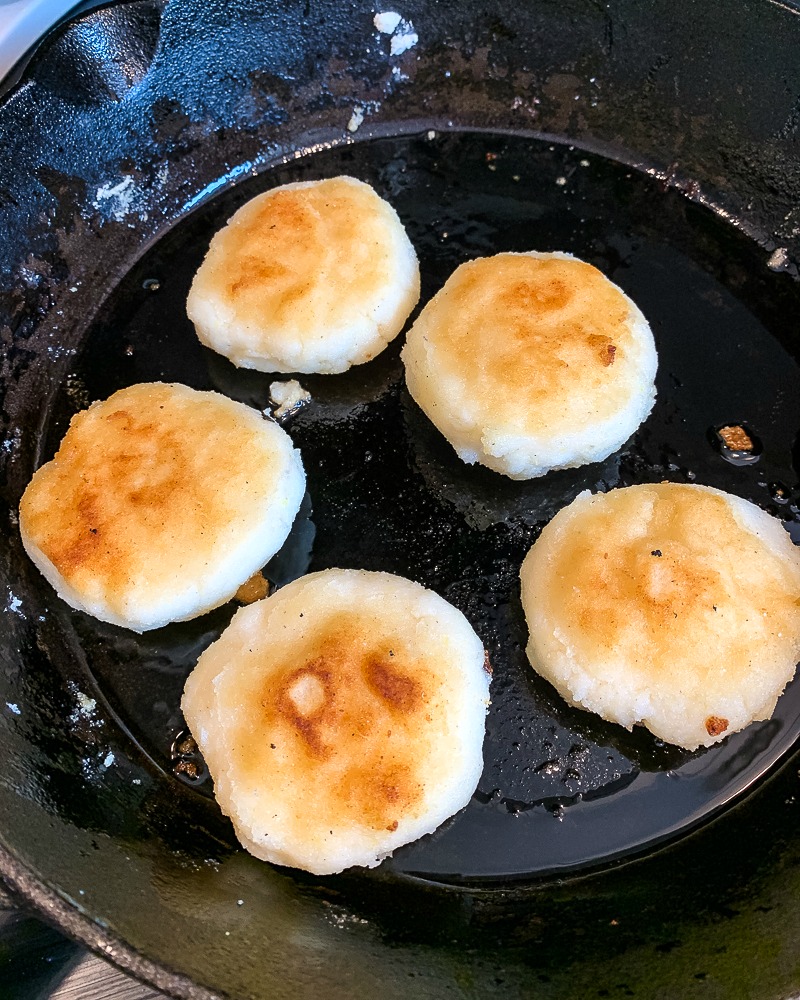
- Heat a layer of vegetable oil in a cast-iron skillet over medium heat. Divide the dough into 8 equal portions. Roll each portion into a ball and then flatten between your palms to make a disc about 1/4"-1/2" thick.
- Fry each corn cake in the skillet for about 5 minutes on each side or until golden brown.
- Use a serrated knife to slice each arepa in half and then fill with your desired fillings. You can also leave it whole and eat as a side dish.
Notes
- Look for a cornmeal that says pre-cocida (pre-cooked) or masarepa, which means that it is a pre-cooked and dried cornmeal. You can find these in the international section of most grocery stores. Brands like P.A.N. or Goya Masarepa are great.
Nutrition
Shaping Method
To make these, the only arepa ingredients you need are cornmeal, water, and a bit of salt. Some recipes use a pinch of sugar or a bit of butter, but I love the ease of a 3-ingredient recipe, so I just stick to the basics. Shaping these corn cakes is all about rolling them into a smooth ball, then lightly pressing them between your palms to make a round, pancake shape about 1/4″-1/2″ thick.
This video shows the texture and shape of how your dough should look. It’s never been so easy!
Arepa Cooking Methods
Arepas are incredibly versatile corn cakes that can be prepared using a few different methods. The key to the Venezuelan-style arepas is that they have a crispy, crunchy exterior and a soft, fluffy interior. In the recipe below, we fried the arepas, but feel free to try out whichever option is most comfortable and convenient for you. Here are a few different styles for cooking them.
Stovetop (Skillet)
This is the most traditional method for making them, and they are most often done on a flat, round cast-iron griddle. If you have a cast-iron pan at home, that is your best option for making these! If not, a non-stick skillet will also work.
To cook these on the stovetop, lightly oil the skillet and place it over medium-high heat. Then, cook the arepas for about 5-7 minutes on each side, allowing them to get a golden-brown crust before flipping them. It’s okay if they get a few charred spots as well.
Skillet + Oven
This is a great way to ensure that the inside gets fully cooked without risking burning the outside, especially with these thicker Venezuelan arepas.
Preheat the oven to 350ºF. Just like in the previous method, you’ll want to heat a lightly oiled skillet over high heat and sear the arepas for about 3-5 minutes per side to give them a golden color and crisp exterior. Place the seared arepas on a baking sheet and bake them in the oven for about 10-20 minutes. They should have a slightly hollow sound when you tap them to tell that they are done.
Frying
Frying creates a wonderfully crispy arepa. To fry them, add enough vegetable oil to coat the bottom of the pan and heat it over medium-high heat. Fry the arepas until golden-brown on both sides.
Grilling
This is a simple method that adds a smoky flavor to the arepas. Place the corn cakes on a grill over medium-low heat until they are crispy and charred on both sides.
Classic Venezuelan Fillings
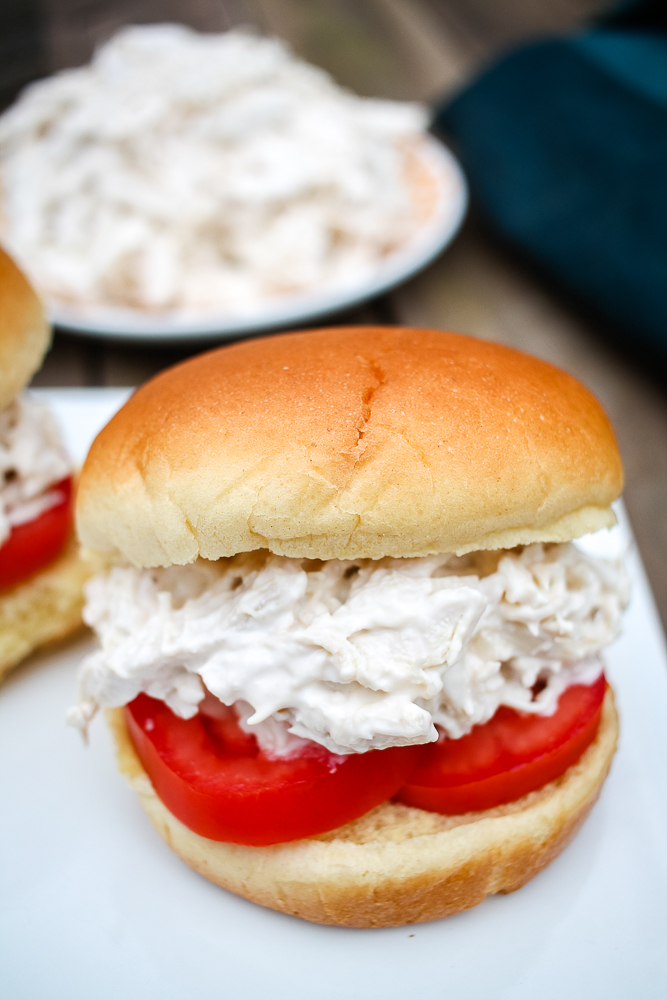
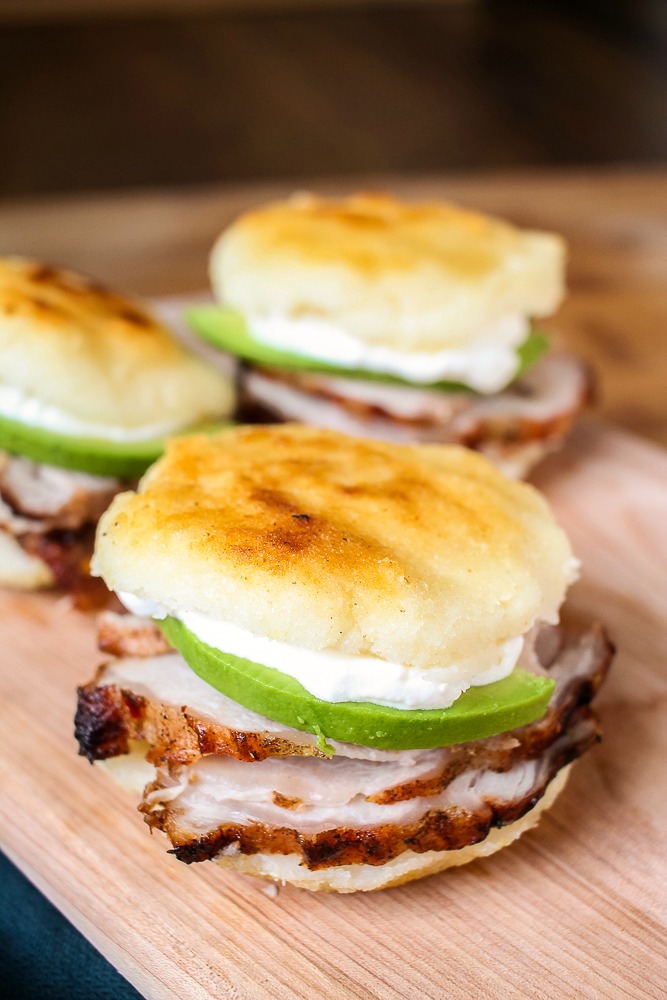
Let’s talk fillings. I’m here to tell you that the fillings are the best part! Arepas are basically edible blank canvases. You can stuff them any way you like. Stuff them with shredded chicken and avocado for the famous reina pepiada, or simply melt cheese inside. There’s no wrong answer, just delicious ones.
Venezuelan arepas are made with a wide variety of fillings, depending on what part of the country you are in and what ingredients are available. Here are some of the most popular stuffed arepas to inspire your own fillings:
- Reina Pepiada: This is similar to a chicken salad. It’s made with shredded chicken, avocado, mayonnaise, and sometimes diced onion, too.
- Domino: This is a simple, classic filling made with black beans and shredded cheese. The name comes from the contrasting colors that resemble a black and white domino inside the arepa.
- Pabellon: Slow-cooked shredded beef, black beans, fried plantains, and a shredded or crumbled white cheese like cotija.
- While this may not be one that you have all the ingredients for, it can definitely inspire some creativity with your own!
- Perico: This arepa is perfect for breakfast! It’s made with scrambled eggs, onion, and tomato, and often includes chives or cilantro as well.
- Other Toppings to Try: Grilled sliced pork, ground beef, sour cream, refried beans, tuna salad, jackfruit, guacamole
If you ever take a trip to South America, these arepa fillings will be some of the more common ones that you’ll see. Get some perfectly ripe avocados and sprinkle them with fresh cheese to keep it simple and tasty. Or, make some Instant Pot Shredded Chicken, spice it to your liking, and use that as the base for the arepas, while everyone tops it how they like.
You can even enjoy these straight out of the pan alongside some soup. Regardless of how you choose to eat your arepas, they are guaranteed to be loved by everyone.
Troubleshooting & Pro Tips
Even though arepas are wonderfully simple, a few small adjustments can make the difference between good and perfect. If something goes wrong, don’t worry, they’re very forgiving!
Use the Right Cornmeal
This is a non-negotiable and the most important tip I can give you. Use pre-cooked corn flour (masarepa). It is very different from regular cornmeal or masa harina. Masarepa is pre-cooked and dried cornmeal that has been specially processed so that it hydrates quickly and creates a soft, pliable dough. This is what makes arepas possible. Using regular cornmeal will feel gritty and won’t stick together well or cook properly.
Look for packages labeled “pre-cooked corn flour”, “pre-cocida”, or “masarepa”. Brands like P.A.N. or Goya Masarepa are commonly available in the international section of grocery stores.
Don’t Flip Too Soon
This is one of the most common mistakes. When cooking arepas on the stovetop, resist the urge to flip them early. If you try to move them too soon, they can stick or tear. Let them cook undisturbed until a golden crust forms. You’ll notice that they naturally release and will slide easily in the pan when they’re ready.
The crust helps with the arepa’s structure to hold up all the delicious toppings that you’ll fill it with, and also to create that crispy exterior that balances perfectly with the fluffy inside.
Adjust the Dough Texture Before Cooking
Your dough should feel soft and smooth, not sticky or dry. Think of it as having a texture similar to playdough. If it seems off, don’t wait until you’re ready to cook to adjust the texture; do it as you’re making the dough.
- If the balls of dough crack when you’re shaping the arepas, add a tablespoon of water at a time and knead gently.
- It is too wet if the dough is sticking to your hands or to the bowl. Sprinkle in some more cornmeal, a little at a time, and continue to knead the dough until it reaches a consistency that isn’t sticky.
Also, if just the edges of the arepas crack slightly while you’re shaping, that’s not a big deal. But you can smooth them with damp fingers to get a perfect shape and consistency. Taking an extra minute to fix the texture of the dough before cooking will save you from having issues later on.
Arepas: FAQs
A few simple answers to help you along your cooking journey. For more questions or comments, be sure to write them below!
Why Did My Dough Crack?
Cracking usually means the dough is too dry. Masarepa absorbs water gradually, so it’s important to let the dough rest for 5 minutes. And if, while shaping, you notice it needs a bit more water, add a tablespoon at a time to the dough and knead gently until the dough feels smoother and more pliable.
Minor cracks won’t ruin arepas, but if the dough is too dry, it’s best to adjust the dough before moving forward with the rest of the recipe. See more about adjusting the dough texture in the “Troubleshooting & Pro Tips” section above.
Can I Bake Arepas Instead of Frying?
You can absolutely bake the arepas, and that’s a great option if you want to use less oil. Baking creates a slightly drier exterior compared to pan-frying, but it will keep the interiors just as light and fluffy. To bake these, place the shaped arepas on a parchment-lined baking sheet and bake at 375ºF for about 20-25 minutes, flipping them halfway through.
That being said, pan frying definitely adds more flavor and a better crust, or try the skillet and oven method I have suggested above for the best of both worlds!
What’s the Best Cornmeal for Arepas?
The best flour for arepas is pre-cooked cornmeal, called masarepa. This is not the same cornmeal used for cornbread or tortillas. Make sure that the package says pre-cooked, pre-cocida, or masarepa to make sure you’re buying the right product, as that will make all the difference in the texture and flavor of your arepas. Use either white or yellow masarepa; they both work great.
If you’re shopping in a regular grocery store, you can find this in the international section.
Anytime Arepas
These Venezuelan arepas are a simple, special, and endlessly versatile recipe to master. And a delicious and easy way to make a traditional dish. With just three simple ingredients, you can create something warm and golden that satisfies even picky eaters. That’s the beauty of arepas.
Turn them into a hearty meal by stuffing them with chicken and avocado or slow-cooked beef and black beans. Or, keep them light by enjoying them on their own or slicing them open with a sprinkle of cheese. There is no right or wrong way to enjoy these. How can it get better than that?
If this is your first time making Venezuelan arepas, let it be the start of exploring more flavors from vibrant cuisines. And if you grew up eating these, I hope this recipe feels like a little taste of childhood. Either way, I hope these arepas bring warmth and joy to your kitchen that leaves everyone wanting more.
More “Sandwich” Inspiration
For more amazing fillings to try in these arepas or in sandwiches of their own, check out the recipes below!
- BBQ Pork Sandwich
- Chick-fil-A Chicken Sandwich
- Grilled Ham and Pear Sandwich
- Strawberry Ice Cream Sandwich
Each of these recipes is a delicious way to bring fresh inspiration to your next sandwich.
Share Your Arepa Adventures!
When you make these arepas, I’d love to hear how you filled yours! Did you go classic and cheesy or try your hand at a traditional Venezuelan filling? Leave a comment and share your favorite combination.